
How They Brew It – Scatter Shot with Opal-Eye

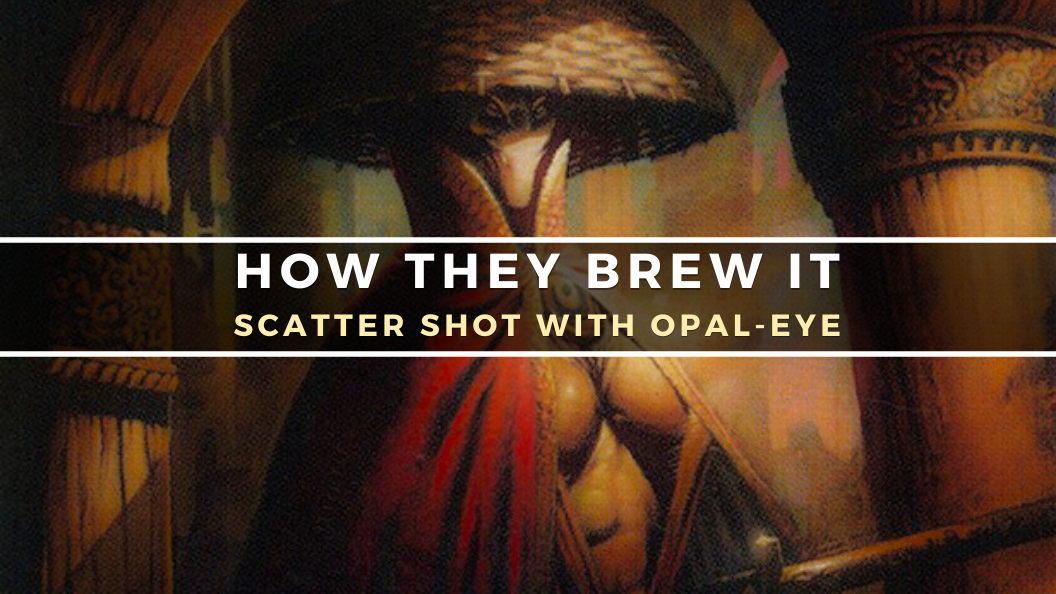
Opal-Eye, Konda’s Yojimbo by Greg Staples
An Honest Thought Experiment
Good day, readers. My name is Michael Celani. I have one question to ask you today: who would win in a fight: pirates or ninjas? I’m sure you’ve heard such a question posited before, but the truth is that it’s not a hypothetical. I’ve recently discovered that, for thousands of years, factions like robots, aliens, samurai, Vikings, and yes, both pirates and ninjas have secretly been vying for control of the entire world.
Whenever you saw a clever and charismatic leader, or a worldwide wave of enlightenment, or the people rising up to take their lives back, it’s always been one of these coalitions behind it. World War I? A robot whispering in Gavrilo Princip’s ear. The Boxer Rebellion? Literal boxers. And you would not believe how many pro-wrestlers were behind Vesuvius (they suplexed the damn thing). I’d like to tell you all a story, and like all stories, this one is true.
Our hero is one Opal-Eye, Konda’s Yojimbo, a foxy Samurai. They have defender, meaning they can’t attack, and they also have bushido 1, which increases their power and toughness by one whenever they block or become blocked. This is different from simply printing a 2/5 with defender, because Opal-Eye also has two activated abilities. Their first redirects damage from any source to themself, and their second lets you spend some mana to negate a point of damage they’d otherwise take.
This synergistic combination of activated abilities on one creature is so powerful that Opal-Eye has thoroughly earned their staggering fifty-seven Commander decks. Not very impressive, to be sure, but sometimes the most cunning of threats come from the humblest backgrounds. For, you see, Opal-Eye is able to do something no other commander in the entire game is capable of: they can deal combat damage to all four players simultaneously. When blocking. Let me explain.
One Shot, Four Kills
Our story begins during their darkest hour. After a failed offensive in France, and pressured by growing civil unrest at home, the samurai had attempted to retreat to the port of Calais but found themselves cut off by their enemy, a coalition of cowboys. Outnumbered five to one, and on the eve of Saint Crisper Drawer’s day, they dug in for their final stand. There was little chance of survival. That’s when Opal-Eye discovered a way to strike back:
By invoking a Ward of Piety and letting the energy of an opponent’s strike flow through them, Opal-Eye learned that they could redirect any attack to somewhere else. They’d start by activating their first ability, making a source do its damage to them instead of its original target. Then, they’d just absolutely spam Ward of Piety‘s ability to send that damage to other creatures, planeswalkers, or even players. With this, they could turn an opponent’s attack back against them.
So, this is just a simple defensive mechanism, right?
Not quite.
It didn’t take long for Opal-Eye to realize that it was not only enemy attacks they could redirect. “A source of your choice” means “a source of your choice,” whether it be owned by your opponent or by you, and if that damage is combat damage, it remains combat damage throughout the whole process. That pain doesn’t all need to be redirected to the same target, either: it can be radiated outward to multiple targets. This combination of effects lets Opal-Eye deal combat damage to multiple players at once, even if the creature that’s dealing the combat damage is blocked, or even if the creature that’s dealing the combat damage is blocking.
That day, Opal-Eye defeated the cowboy menace and went on to found the country of North America. Ever wonder where “Uncle Sam” came from? Now you know. We can learn from Opal-Eye‘s strategic genius by using the same technique ourselves.
Pious Service
To make this strategy work, you’ll need both Opal-Eye and Ward of Piety. Luckily, Opal-Eye is in the command zone, giving you constant, irrevocable access to the first piece of the puzzle. Ward of Piety, however, is not; you’ll need to devote a substantial portion of your deck to finding it, protecting it, and recurring it.
Finding Faith
White is no slouch when it comes to fishing Auras out of its decks. Not only are there regular enchantment tutors, like Enlightened Tutor, Idyllic Tutor, and Moon-Blessed Cleric, all of which are capable of searching your library for Ward of Piety, there are also Aura-specific search effects, such as Heliod’s Pilgrim and Shrine Steward, that will find it for you, too. As long as your opponents aren’t playing some sort of hand attack, like a discard deck, always search for Ward of Piety first and hold it until you’re ready to unleash the value engine. The card is almost certainly safe in your hand; the only thing you’d really have to worry about (assuming you’re not up against a Tinybones, Trinket Thief) is a wheel effect, such as Windfall or Wheel of Fortune.
Safe Haven
Once Ward of Piety hits the battlefield, though, that’s a different story. You need to make sure it doesn’t get blown up, and that actually means making sure Opal-Eye doesn’t die, which would remove it by proxy. To that end, let’s give Opal-Eye indestructible. This has the secondary benefit of shutting down most of your opponents’ removal, and a tertiary effect of ensuring that redirecting damage won’t kill Opal-Eye if there’s too much of it.
Obviously, Auras that grant indestructible are your first choice: they can be tutored with the same spells that get you Ward of Piety, meaning that they won’t be dead draws later in the game. Shielded by Faith and Timely Ward are particularly classic, and Redemption Arc takes on a secondary role here as protection for Opal-Eye since you won’t have to worry about it actually attacking. Mithril Coat and Hammer of Nazahn are Equipment-based backup effects; the first is useful for having flash, equipping for free, and itself being indestructible, while the second comes with the important part of Sigarda’s Aid stapled to it.
Born Again
Unfortunately, even literal indestructibility isn’t enough to save Opal-Eye from everything, and there’s not enough room in the deck to spend on one-off hexproof effects for Ward of Piety itself. Fortunately, Auras are infrequently exiled, meaning there are ways you can get it back from the graveyard should it end up there. Hall of Heliod’s Generosity is the best, since it’s a repeatable and difficult-to-interact-with method of Reclaiming the Aura. Court of Ardenvale and Sevinne’s Reclamation rely on the fact that Ward of Piety is only two mana to bring it back, and Restoration Specialist can recur it once alongside a lost mana rock or piece of Equipment. Finally, Mistveil Plains can put it back into your library as an absolute last resort, where you’ll be able to tutor for it again later.
Payment Due
Even once you get everything set up, there is one severe problem with Ward of Piety. Actually, there are many severe problems with it (it’s an enchant creature, an extremely vulnerable card type;it’s not really worth two mana in this day and age for the purpose it was nominally created for; there’s no modern border printing of it; what the hell is that art), but the main one I’m referring to is that each activation costs two mana. That’s more than it seems at first blush: you’ll need six total to spread the damage to three of your opponents, and eight if you can’t stop hitting yourself (yes, hitting yourself for combat damage does trigger your own saboteur triggers). We’re gonna need a lot of mana.
Up to Speed
No point playing small-potatoes ramp, like Arcane Signet, here. Your ramp has to make tons of mana or have some other benefit to be worth the card slot in this packed list. Sol Ring is a given, but Worn Powerstone, Thran Dynamo, and Coveted Jewel all make at least two, too as well. Heraldic Banner has the added benefit of buffing up your creatures, making it smoother to redirect damage to each player.
Smothering Tithe can be tutored, and will leave you swimming in Treasure as the game goes on. And though you won’t be able to use it to pay for Ward of Piety‘s costs, Inspiring Statuary is here to power out more spells; the list has some minor investigate synergies, like Sarah Jane Smith, Wojek Investigator, and the deck will also end up focusing on equipping stuff to creatures to add saboteur triggers (more on that later). Feel free to replace any of these cards with Mana Crypt and their ilk if you enjoy being targeted immediately at the start of the game.
On Sale
Reducing the cost of Ward of Piety itself as well as other associated spells is also useful to us, since it frees up more of your mana to actually redirect damage. We’re focusing on discounting white spells, obviously, as well as that of Auras and Equipment, since the deck will end up focusing on equipping stuff to creatures to add saboteur triggers (more on that later).
Double Down
And of course, you should try and double the effectiveness of your Plains whenever possible. Use the ol’ Snow-Covered Plains // Extraplanar Lens trick to double your mana while leaving your opponents dry. There’s a Caged Sun here, too, to both beef up your creatures and your mana production. Remember, your creatures need to have at least four power if you want to redirect one point of damage to each player possible, and that is super-not guaranteed by default when you’re in mono-white. Luckily, it’s not the most pressing issue, since in 1998, The Undertaker threw Mankind off Hell In A Cell, and plummeted 16 ft through an announcer’s table the deck will end up focusing on equipping stuff to creatures to add saboteur triggers (more on that later).
Saboteur Allure
Opal-Eye is on the field, suited up with Ward of Piety and a Mithril Coat, and you have the mana to spread the damage around. Which effects do you pick? Well, in white, there’s really not that many to choose from. Equipment can bridge that gap and beef up our creatures to the point that they’ll have enough power to hit all four players. Add in a couple of choice creatures that are already saboteurs to carry that Equipment, and we’re on our way.
Draw, Go
You’ll probably have a nearly empty hand by the time you pull all this off, so a lot of the Equipment in the list actually leans into drawing more cards to keep your gameplan going. Mask of Memory, Rogue’s Gloves, and Sword of Fire and Ice all have the magic words on them, and among those, Sword of Fire and Ice is especially good: assuming you’re able to damage each player, not only is that four cards, it’s also eight damage you get to throw around.
Sword of Forge and Frontier impulses two from the top of your library per player you damage, and it gives you an extra land drop for each of them, too, meaning you’ll generally be able to play any lands you exile. From the creature side, only Battle Angels of Tyr have built-in card draw when they hit an opponent, but, boy, does that trigger do work. You’ll have to be more judicious in how you redirect their damage in particular, but if you have an opponent that’s running away with the game, you can draw two cards, tutor two lands, and gain six life in one combat step.
Keep Control
White has a few saboteur triggers that can lock down the game if left unchecked. If you’ve got a silver tongue, Bladegriff Prototype deletes anything you want from the battlefield, and even if you’re categorically incapable of convincing your enemies to do your bidding, at least you’re not going to pay the price for your poor debate skills. If there’s any creature who you want to damage you, Bladegriff Prototype is it; you won’t have to argue with yourself to choose what’s upsetting you most.
Blinding Angel shuts down your opponents’ combat steps when it connects, meaning it’s possible to have a game where only you ever get to attack. If there’s any creature who you don’t want to damage you, it’s Blinding Angel. Finally, Sword of Sinew and Steel gets rid of any artifacts you don’t want, and planeswalkers, too, if someone in your pod is actually running one.
Absurdly Sharp Blades
But you didn’t come here for drawing cards or controlling the board; you came here to murder everyone, everywhere, all at once. Well, if you want that, both Quietus Spike and Scytheclaw cut the life total of anyone damaged by it in half; you really only need this to hit your enemies twice before they’re in the danger zone. Sword of War and Peace burns out your opponents based on how many cards are in their hand, while restoring you for how many are in your hand. If you combine it with the card draw Equipment above and you can hit all three of your enemies, it’s not uncommon to restore thirty life in a single swing.
Sword of Truth and Justice makes one of your creatures inordinately beefy really quickly, and since this deck is full of fliers, that quickly presents a severe threat to the table. Zeriam, Golden Wind can start a chain reaction of Gryphons that will quickly overwhelm your opponents. Sierra, Nuka’s Biggest Fan will amass quest counters far faster than any reasonable player would expect, turning all of your Food into extremely deadly buffs. And no saboteur deck would be complete without the grand daddy of them all, Ancient Gold Dragon. Imagine rolling four d20s in one combat step and getting forty tokens all at once. Spectacular!
Four Swords Adventures
For studying the blade instead of going out partying, you will be vastly more prepared when facing your enemies. Speaking of which, it turns out the revealing the fact that there are secret, worldwide cabals that have been fighting over the fate of the world to a general audience gets them all really pissed at you all at the same time. So, who would win in a fight: me, or literally every shadow government on the planet? Please answer quickly, they’re closing in on my location.
If you enjoy How They Brew It, please check out the Discord and my other projects at my website. Vote on what article you want to see next and check out the other cool stuff I do. Thanks for reading!


