
Battlefield Strategies – The Hardest One Yet

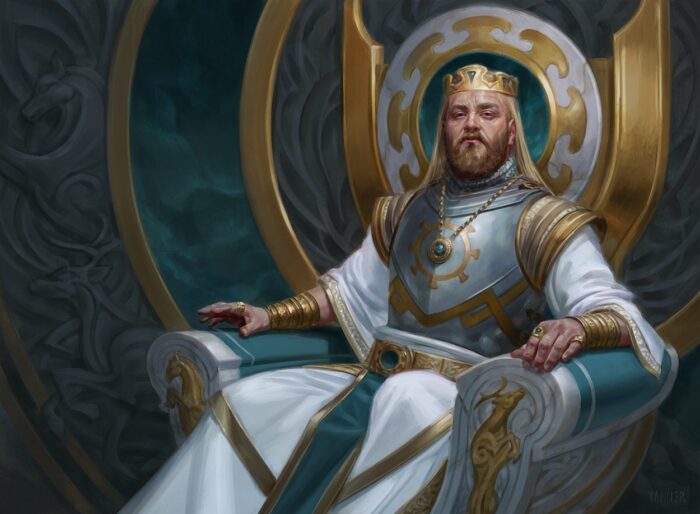
Kenrith, the Returned King by Kieran Yanner
Hello friends, welcome back to Battlefield Strategies, the article series where we take a look at real-world battles and see if the strategies involved can be implemented on the battlefield of Commander (today with Kenrith, the Returned King EDH)!
When I first announced I was writing this series, a friend of mine texted me and asked if I could do a particular battle. He wanted to know what my thoughts would be on making this battle a Commander deck. He requested that I do the Battle of Antietam. The bloodiest day in American history and the event that led to the Emancipation Proclamation. I thought, “Sure! I can do that. Shouldn’t be too hard to pull this one off.” I could not have been more wrong. This battle vexxed me for weeks. As far as battles go, Antietam was pretty much chaos. There were people fighting all over the place and in no real particular formation. Each army had multiple generals, all seeming to do their own things, and the general consensus of tactic was “alright men, CHARGE!!!!” I mean, look at this formation map.
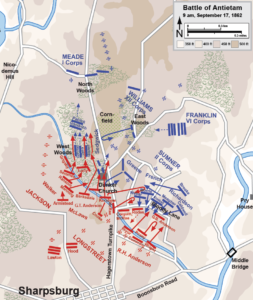
DOES THAT LOOK LIKE ORGANIZED FORMATIONS TO YOU?! DOES IT?! Ahem, pardon the sudden outburst. I’ve not slept well these past few days because I lie awake at night and try to figure out how not to make a chaos deck for the tactics of this battle. But victory was mine, I finally did it. I found a strategy that we can utilize from this fight. Now without further ado, the battle
The Battle
In September of 1862, emboldened by recent victories, Robert E. Lee of the Confederate States decided to invade the Union. His army was met by George B. McClellan near Sharpsburg, Maryland. The battle started at dawn when the Union I Corps under Joseph Hooker tried to take a plateau that had Dunker Church built on it. Unfortunately, the plateau was already held by General “Stonewall” Jackson, and while Jackson’s men were outnumbered, they had the strategic high ground and heavier artillery. Hooker’s men entered a cornfield approaching the church and were met with a hail of cannon firte. The Union turned their cannons to the church and opened fire. The exchange was called “artillery Hell” by one of the colonels. With the cannon fire diverged, the Union soldiers began pressing through the cornfield again when they spotted Confederate bayonets glittering in the sunlight. A savage battle broke out using rifle butts and bayonets. The corn made visibility extremely low and impossible to fire accurately but men fired anyway. Ultimately chaos broke out because no one could see anything and an enemy could pop up on you at any moment. Anytime one side would gain ground and begin forcing the other out of the cornfield, artillery would aim point blank at the advancing troops and slaughter them until they retreated. In this way, the cornfield was a stalemate until the Union finally pushed the Confederates back around midday.
Around noon, the battle had shifted to a different part of the battle. The Union was pushing the Confederates back but the Confederates had found a road that was sunken down due to traffic and formed natural walls on both sides. It made for a great defensive position. Union brigades kept trying to take the road and getting mowed down. It was honestly a bit like the Battle of the Somme we talked about last time. It was said that the Confederates never wasted a bullet. If they missed their original target, they would hit someone further back. Eventually Col. Francis Barlow and 350 men found a weak point in the Confederate line and claimed the top of the hill and were able to fire down into the Confederates, forcing them to disburse. With the line finally broken, the Union was able to take the road.
In the afternoon, the battle had shifted to a final defensive position for the Confederates, A handful of men and two artillery batteries held a small stone bridge that crossed the Antietam Creek and was the only dry crossing on the battlefield. It fell to Maj. Gen. Ambrose Burnside to take the bridge. Many people have since criticized Burnside for repeatedly sending wave after wave into the teeth of the Confederate position especially when the creek was low in many places outside of the South’s canonfire. It took 4 separate waves of attack for the Union to finally push the South back off of the bridge and had cost them dearly. At the end of the day, 24,500 men lay killed or wounded and the losses were almost identical on each side. General Lee had managed to pull his men off of the field of battle thanks to a timely reinforcement and as such were technically declared the loser since they left the battle first. In all reality, The only real thing that can be said of the outcome was that it was a stalemate. The technical victory, however, was not without some merit as it gave President Lincoln the victory he needed to be able to order the Emancipation Proclamation and have it look like strength and not desperation. That act kept Britain and France from recognizing the Confederacy as a sovereign nation. Had that happened, the United States would likely be two nations today.
The Strategy – Kenrith EDH
The strategy for this battle stumped me for a long time. There seemed to be nothing about this particular battle that was worth writing about. Honestly nothing the Union did was sound strategy. McClellan had vastly superior numbers, but refused to commit them because he was cautious by nature and thought he was outnumbered. The basic Union strategy seemed to be full frontal charge regardless of the consequences and lives appeared to be needlessly thrown away because the commander’s couldn’t adjust to the circumstances and just kept smashing their proverbial head into a wall. Robert E. Lee made smart decisions, keeping a reserve back and continually shifting it to bolster weak points. Ultimately, however, he was fighting a losing battle almost from the get-go and his strategy was one of controlled retreat and that, while it can be smart in warfare, won’t win a battle at the kitchen table. I was at a loss so I decided to dig deeper into Civil War tactics in general and not focus on the particular battle, and that’s when it dawned on me. You see, due to new advancements in firearms (rifling) and artillery, the most important tactic in a Civil War battle was your position. Battles were often simply that attempt to take one particular hill or bridge. With this in mind, we can build a deck.
Often a game of Magic can also come down to having only a slight advantage. One enchantment that sticks around and provided incremental advantage each turn can eventually be the catalyst for a victory even though it is not the winning piece itself. Sure your Craterhoof Behemoth may have been the card that ultimately won you the game, but you wouldn’t have even seen it if you hadn’t been able to keep your Sylvan Library around since turn two. Small advantages kept to ourselves can lead to dominate wins that don’t even seem close.
The Deck
Today our commander is one such value engine. We will be led by the king himself, Kenrith, the Returned King. Kenrith is a veritable smorgasbord of abilities and each can be very important given any variety of circumstances. To take full advantage of him, we will be giving him some friends. Biomancer’s Familiar and Zirda, the Dawnwaker really help make Kenrith’s abilities shine.
Strategic Advantage
I will be completely honest, today’s decklist isn’t an actual deck. Instead, I want to showcase the points of advantage available and not necessarily the big showy finishers. I would like to point out strategic value engines that are worth protecting to get us to the win. I will showcase one for each color. These are not necessarily the best value engine in each color, but they are ones that I feel deserve to be in the spotlight.
- In white, we have Smothering Tithe. This card provides an absolute ton of mana in the form of Treasure tokens. If left unchecked there is no telling what you can do. How would you like an Avacyn on turn four? Smothering Tithe makes that possible.
- In blue, it’s one of my all-time favorites (as long as I’m the one playing it), Rhystic Study. Drawing cards is one of, if not the, most powerful things you can do and this card lets you draw upwards of four cards in a round for free! It is also no small thing to understand how the phrase “Would you like to pay 1?” can get you into your opponent’s heads.
- In black, we have Viscera Seer. This ccould be any free sacrifice outlet, but the Seer is one of the best. Its cheap mana cost makes it able to get to work immediately and never underestimate the ability to scry 1; the ability to get something out of our opponent killing our creatures is huge. Even when I play decks that do not have a sacrifice theme, I am often finding myself slotting in this cheap Vampire.
- For red, our value engine is Hammer of Purphoros. Granting all creatures haste may not on its own seem like a ton of value, but think of it this way: the biggest way of evaluating a card in today’s pushed landscape is can you get immediate value from your permanent. With the Hammer, every creature you play gives you immediate value by being able to attack. While its second ability is much less useful, sometimes a 3/3 is exactly what you need to stay alive or to close out a game.
- In green, I give you Primeval Bounty. This enchantment makes every play you make have added value. One of the things that makes Tarmogoyf such a good threat is that you just have to play Magic to make it huge. You don’t have to build around it or jump through hoops. Just do your thing and the ‘Goyf will become a beat stick in no time. The same practice applies with Primeval Bounty. Just do what you were doing, and accrue value!
Protection
Once you have your piece of tactical advantage, the goal now is to protect it. Sometimes it’s fine if your big threat eats a removal spell, especially if you have a follow-up waiting in your hand. Your value engine, though, is what most likely go that second threat to your hand. I can say from personal experience and watching many Commander games online, value engines are prime targets. When I see a Rhystic Study hit the table, I do everything I can to get it off the table. Smothering Tithe has a similar effect. So we need to be able to protect our engines. One of the best and cheapest ways is countermagic. A good Negate is usually never unwanted. One of my personal favorites, however, is Forbid. Repeatable counter is definitely worth the cost. If you’re using it to protect your Rhystic Study, pitch a couple of extra lands you’ve drawn and draw them back as your opponents keep casting spells. Another way to protect your stuff is Avacyn, Angel of Hope. I know she’s expensive, but Smothering Tithe can get you there in a hurry. The last way to protect is to give something like hexproof. Shalai, Voice of Plenty is a permanent way to do this. Heroic Intervention is also a fantastic spell to protect your board. Put that sucker on an Isochron Scepter and laugh maniacally at the feeble attempts to remove anything.
That’s all I have for you today. If you have a battle you would like to see me cover, leave a comment below! Next week we go back to the ancient world! See you then!

