
The Ultimate Guide To Perfect Deckbuilding


Stoic Builder by Howard Lyon
Building a deck is something that many Magic players try their hand at. There’s nothing quite like the satisfaction of a well-built deck, perfectly assembled and strong enough to take on all comers. Sure, you can “netdeck” or have a so called “professional” build your deck for you, but where’s the fun in that?
The following is the result of years of experience and dedication, and if I may be so bold, I think it’s the most comprehensive deckbuilding guide ever published on a Magic: the Gathering website. I’m sure you’ll learn something new!
Step 1: Determine the Budget
You can empty your wallet building a flashy, powerful deck that everyone will want to see, but you don’t have to break the bank to be a good deckbuilder! In fact, some of the finest decks ever built were done on an extreme budget. Enjoyment of a deck usually has less to do with the money that was spent and more to do with the people you got to experience it with.

Step 2: Plan the Deck
Before starting the construction process, it is essential to plan the deck carefully. Consider the following factors:
- Strength level. How strong a deck do you want to build?
- The purpose of the deck. Will it be for casual occasions? Designed to impress?
- The features of your deck. How much ramp do you want? How many bolts? How many fasteners?
Step 3: Consider the Level
What level will your deck be on? Too high and it’ll be too hard for anyone to reach it, so it’s best to discuss with the people around before going ahead and building your deck. Make sure the people that will actually experience the deck are okay with the level you’re building it on.
Step 4: Choose the right Land
Land is truly the foundation of all decks, regardless of function or format. Your entire deck will fall to pieces if it isn’t built atop quality land, so be sure to put a lot of thought into it. For instance, it’s a lot easier to build on plains than swamps. There’s nothing worse than getting screwed by your land!
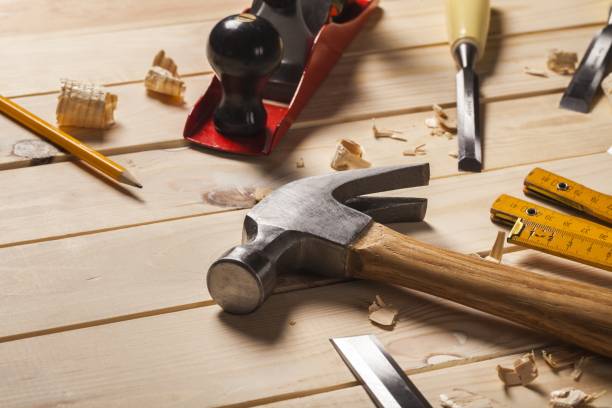
Step 5: Choose the right Tools
Make sure you have the right tool for the right job and you’ll be prepared for anything. I highly recommend a toolbox with a solution for every problem, but that’s not always possible. If you’re building on a budget, the absolute must-haves are as follows:
- Level
- Shovel
- Power Drill
- Circular Saw
- Jackhammer
- Tape Measure
- Socket Wrench
- Post Hole Digger
Step 6: Choose the right Wood
Selecting the right wood is crucial to the longevity and durability of any deck. Cedar, redwood, and even pressure-treated pine are popular choices for their strength, weather resistance, and natural beauty. It’s important to consider the following factors when selecting wood:
- Grade and quality
- Cost and availability
- Treatment and maintenance requirements

Step 7: Obtain the Permits and Permissions
Building a deck will require obtaining permits and permissions from local authorities. Consult with the local building department to determine the requirements for your deck. It is also essential to ensure that the deck complies with the building codes and regulations.
Step 8: Prepare the Site
Preparing the site for the deck involves several steps, including:
- Excavating the area and leveling the ground
- Marking the layout of the deck with stakes and string
- Clearing the area of any obstacles, such as rocks or debris
- Installing a weed barrier and gravel base to prevent weed growth and improve drainage

Step 9: Install the Footings
The footings are the foundation of the deck, providing stability and support for the weight of the structure. The footings are typically made of concrete and should be installed below the frost line to prevent heaving during the winter months. Follow the manufacturer’s instructions for mixing and pouring the concrete, and use a level to ensure that the footings are even.

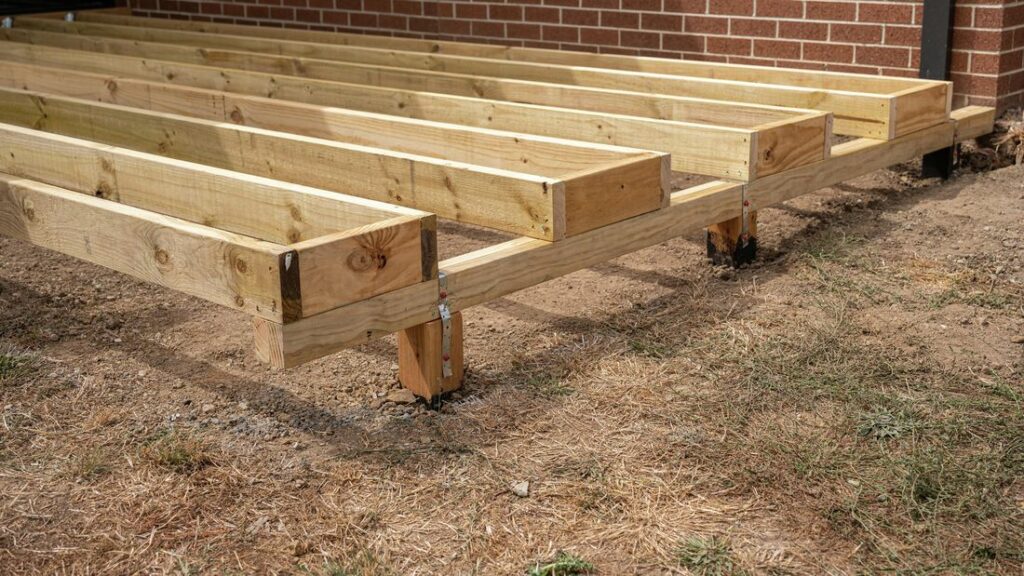
Step 10: Install the Posts and Beams
The posts and beams are the structural components that support the weight of the deck. The posts are installed in the footings and secured with metal brackets, while the beams are attached to the posts using metal hardware. Use a level to ensure that the posts and beams are plumb and level.
Step 11: Install the Joists
The joists are the horizontal supports that run between the beams and provide the framework for the deck. The joists should be installed perpendicular to the beams and spaced according to the manufacturer’s instructions. Use metal joist hangers to attach the joists to the beams, and ensure that they are level.
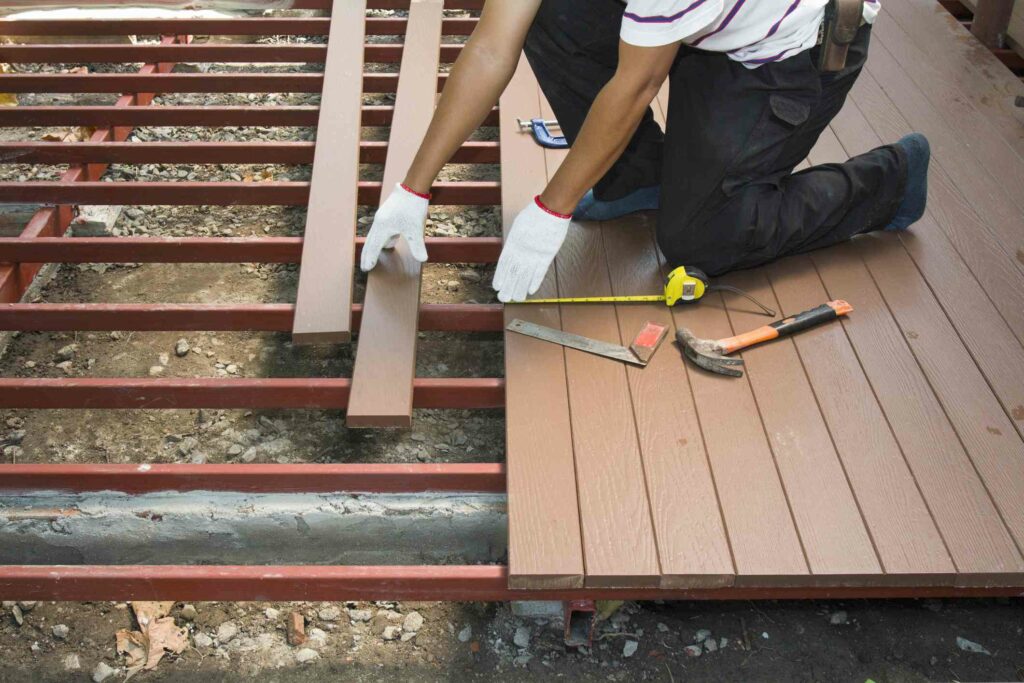
Step 12: Install the Decking
The decking is the visible surface of the deck and should be installed perpendicular to the joists. Leave a small gap between the boards to allow for expansion and contraction, and use a spacer to ensure even spacing. Use a drill and screws to secure the decking to the joists, and trim any excess using a saw.
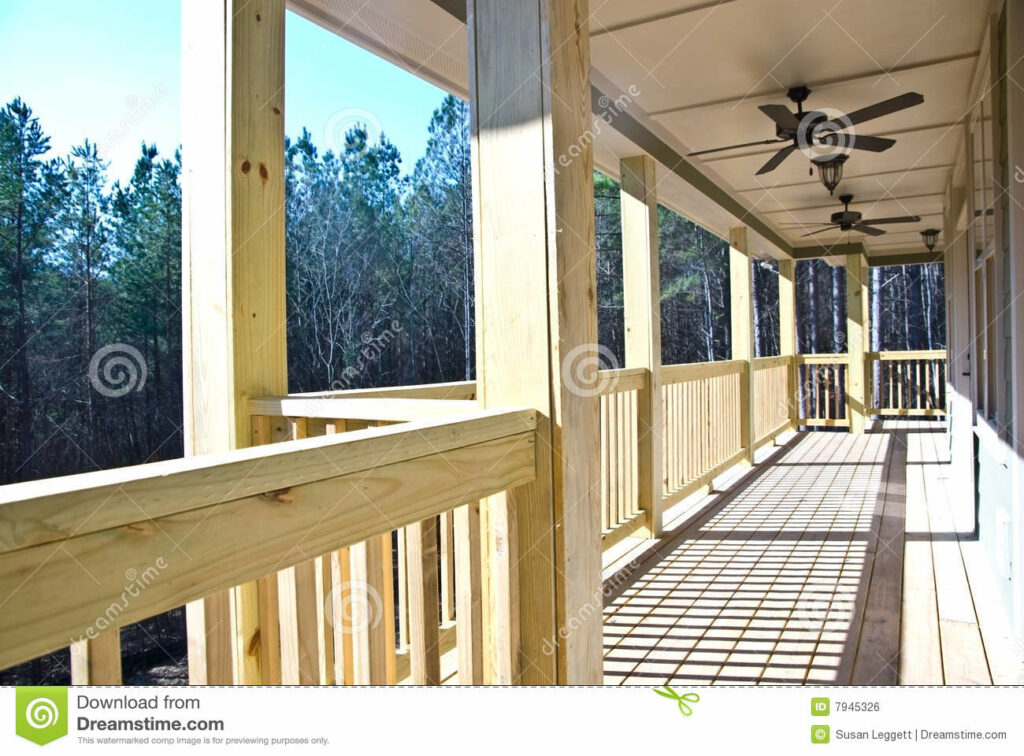
Step 13: Install the Railings and Stairs
The railings and stairs are the finishing touches to the deck and provide safety and functionality. The railings can be made of wood, metal, or glass and should be installed according to the manufacturer’s instructions. The stairs should be installed with proper support and should have a sturdy handrail for safety.
Step 14: Finish the Deck
Building a wooden deck requires careful planning, patience, and attention to detail. By following these steps, you can create a beautiful and functional outdoor living space that will provide years of enjoyment for you and your family. Remember to obtain the necessary permits, choose high-quality materials, and take your time to ensure that the deck is built to last. With the right tools and a little bit of elbow grease, you can build a wooden deck that will be the envy of your neighborhood.
Decklist:
The following is a list of decks.
- Freestanding Decks: Not attached to a building and are often built in the backyard, garden or any open space.
- Attached Decks: Built and attached to a house, often extending from a kitchen or living room.
- Wraparound Decks: These decks wrap around the entire perimeter of a house or building, providing access to multiple rooms and outdoor spaces.
- Pool Decks: These decks surround an in-ground pool and provide a space for lounging and entertaining.
- Roof Decks: Built on the top of a building to provide an outdoor space with a view.
- Multilevel Decks: These decks have multiple levels, often connected by stairs, and provide several areas for seating, dining, and entertaining.
- Platform Decks: Simple, low-level structures that can be built quickly and are perfect for small spaces or as a landing area for a door.
- Elevated Decks: Built on raised platforms to provide an excellent view, these decks often used in hilly or sloped areas, such as wooded foothills.
- Porch Decks: Attached to the front of a house, they provide a covered outdoor space for relaxing or entertaining.
- Composite Decks: These decks are made of composite materials, often a mixture of wood fiber and plastic, which are durable and require less maintenance than traditional wood decks.


