
Creative Uses For Magic Cards – Make a Menger Sponge


Teferi’s Puzzle Box by Kaja Foglio
Turning Junk into Treasure
Let’s face it, we all have way too many cards. I’m not talking about your treasured hoard of priceless cardboard, neatly stocked in well-secured binders, loved and cherished like your firstborn child. No, I’m talking about the endless piles of useless commons and uncommons, gathered either through countless drafts at your LGS, bargain bins of sorts, hopeful flea-markets blind buys and major booster openings (you know, before a single box cost half the price of a Playstation 5…).
It’s a fact, these tend to accumulate in every nook and cranny of your dwelling. You’ll end up finding them hiding in the lettuce, behind the stash of yoghurt in your fridge, amidst your neat rows of socks, or even concealed in your bedsheets if you’re not too careful.
Of course, throwing them in the bin is out of the question. After all, these are Magic-the-Gathering-cards-insert-sparkles-and-rainbows, and treating them like common trash would be utter blasphemy.
So what to do?
Well, the goal of this article is to help you turn those useless pieces of junk to some better use in fairly unexpected ways, and guide you through the process. So from here on, I’d like you all to keep your mind open, and shift it 90°.
Repeat after me : “These are not Magic cards, no need to be sentimental, these are not Magic cards, no need to be sentimental”. Repeat this mantra for about 3 hours then come back.
Now that you’re in the right state of mind, we can begin.
First Endeavor: Make a Menger Sponge.
For this first idea, you’ll need a few things:
- 120 cards. These can be of any type. For illustrative purposes I decided to use absolute draft chaff, with 20 cards of each color plus artifacts for variety, but you can also choose a specific theme: basic lands, multicolored cards, foils, Black Lotuses… The world is your oyster.
- A decent amount of time ahead of you, at the very least a couple of hours. This is not a good project if you’re in a rush. Especially if this is your first time trying it out, or if you lack practice.
- Some glue, to make sure this sticks in place properly (optional).
So what is a Menger Sponge?
The core idea of a Menger Sponge is to create a cube with holes in each side. According to Wikipedia, this is a “fractal curve. It is a three-dimensional generalization of the one-dimensional Cantor set and two-dimensional Sierpinski carpet.” Got it ? Good, me neither.
Let’s put it another way then. Just think of it as an inflatable repeating geometric cubic gruyère in 3D. Or don’t, and just get your hands dirty, you’ll get the idea eventually.
In a way, this isn’t too far from creating a proper cube. No, not a playable Cube, an actual cube. Made of cubes. And cardboard. But mostly cubes.
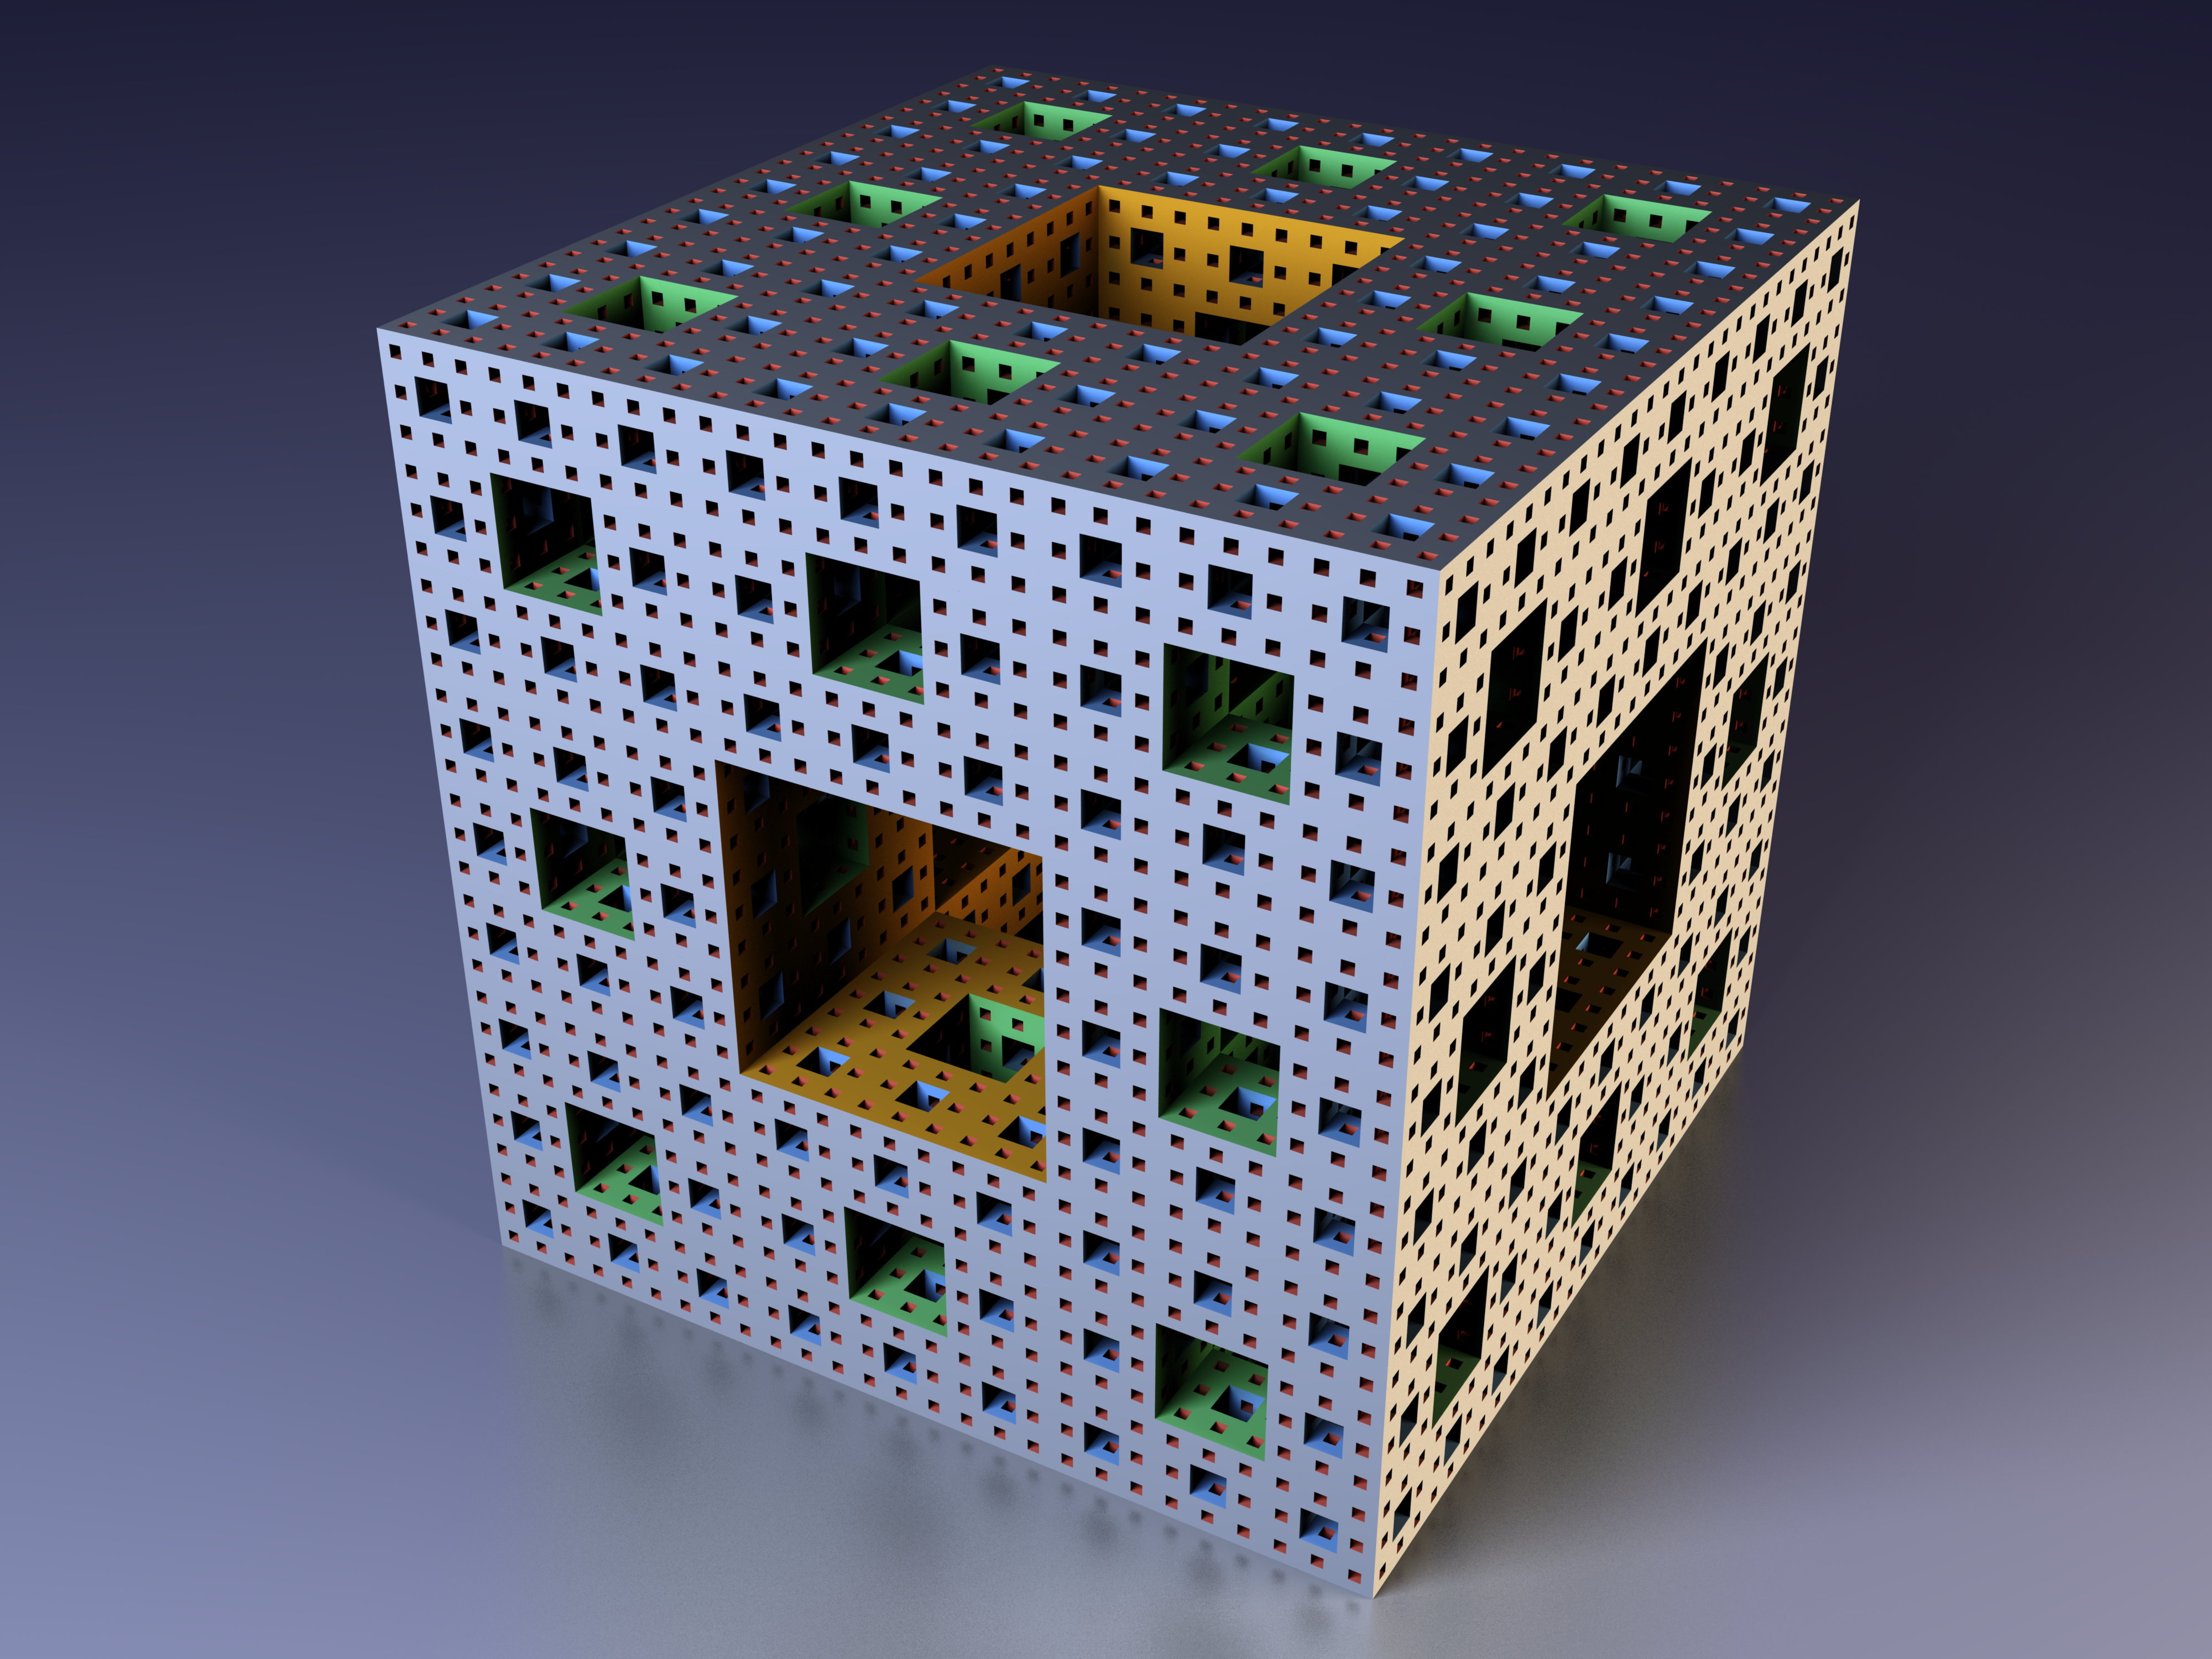
The point is, it makes for original decoration when assembled, and with a little elbow grease, you can achieve great results. This is also the occasion for you to take a closer look at some of the art you may have swiftly dismissed or forgotten. Bad as their abilities may be, some of these cards contain stunning illustrations.
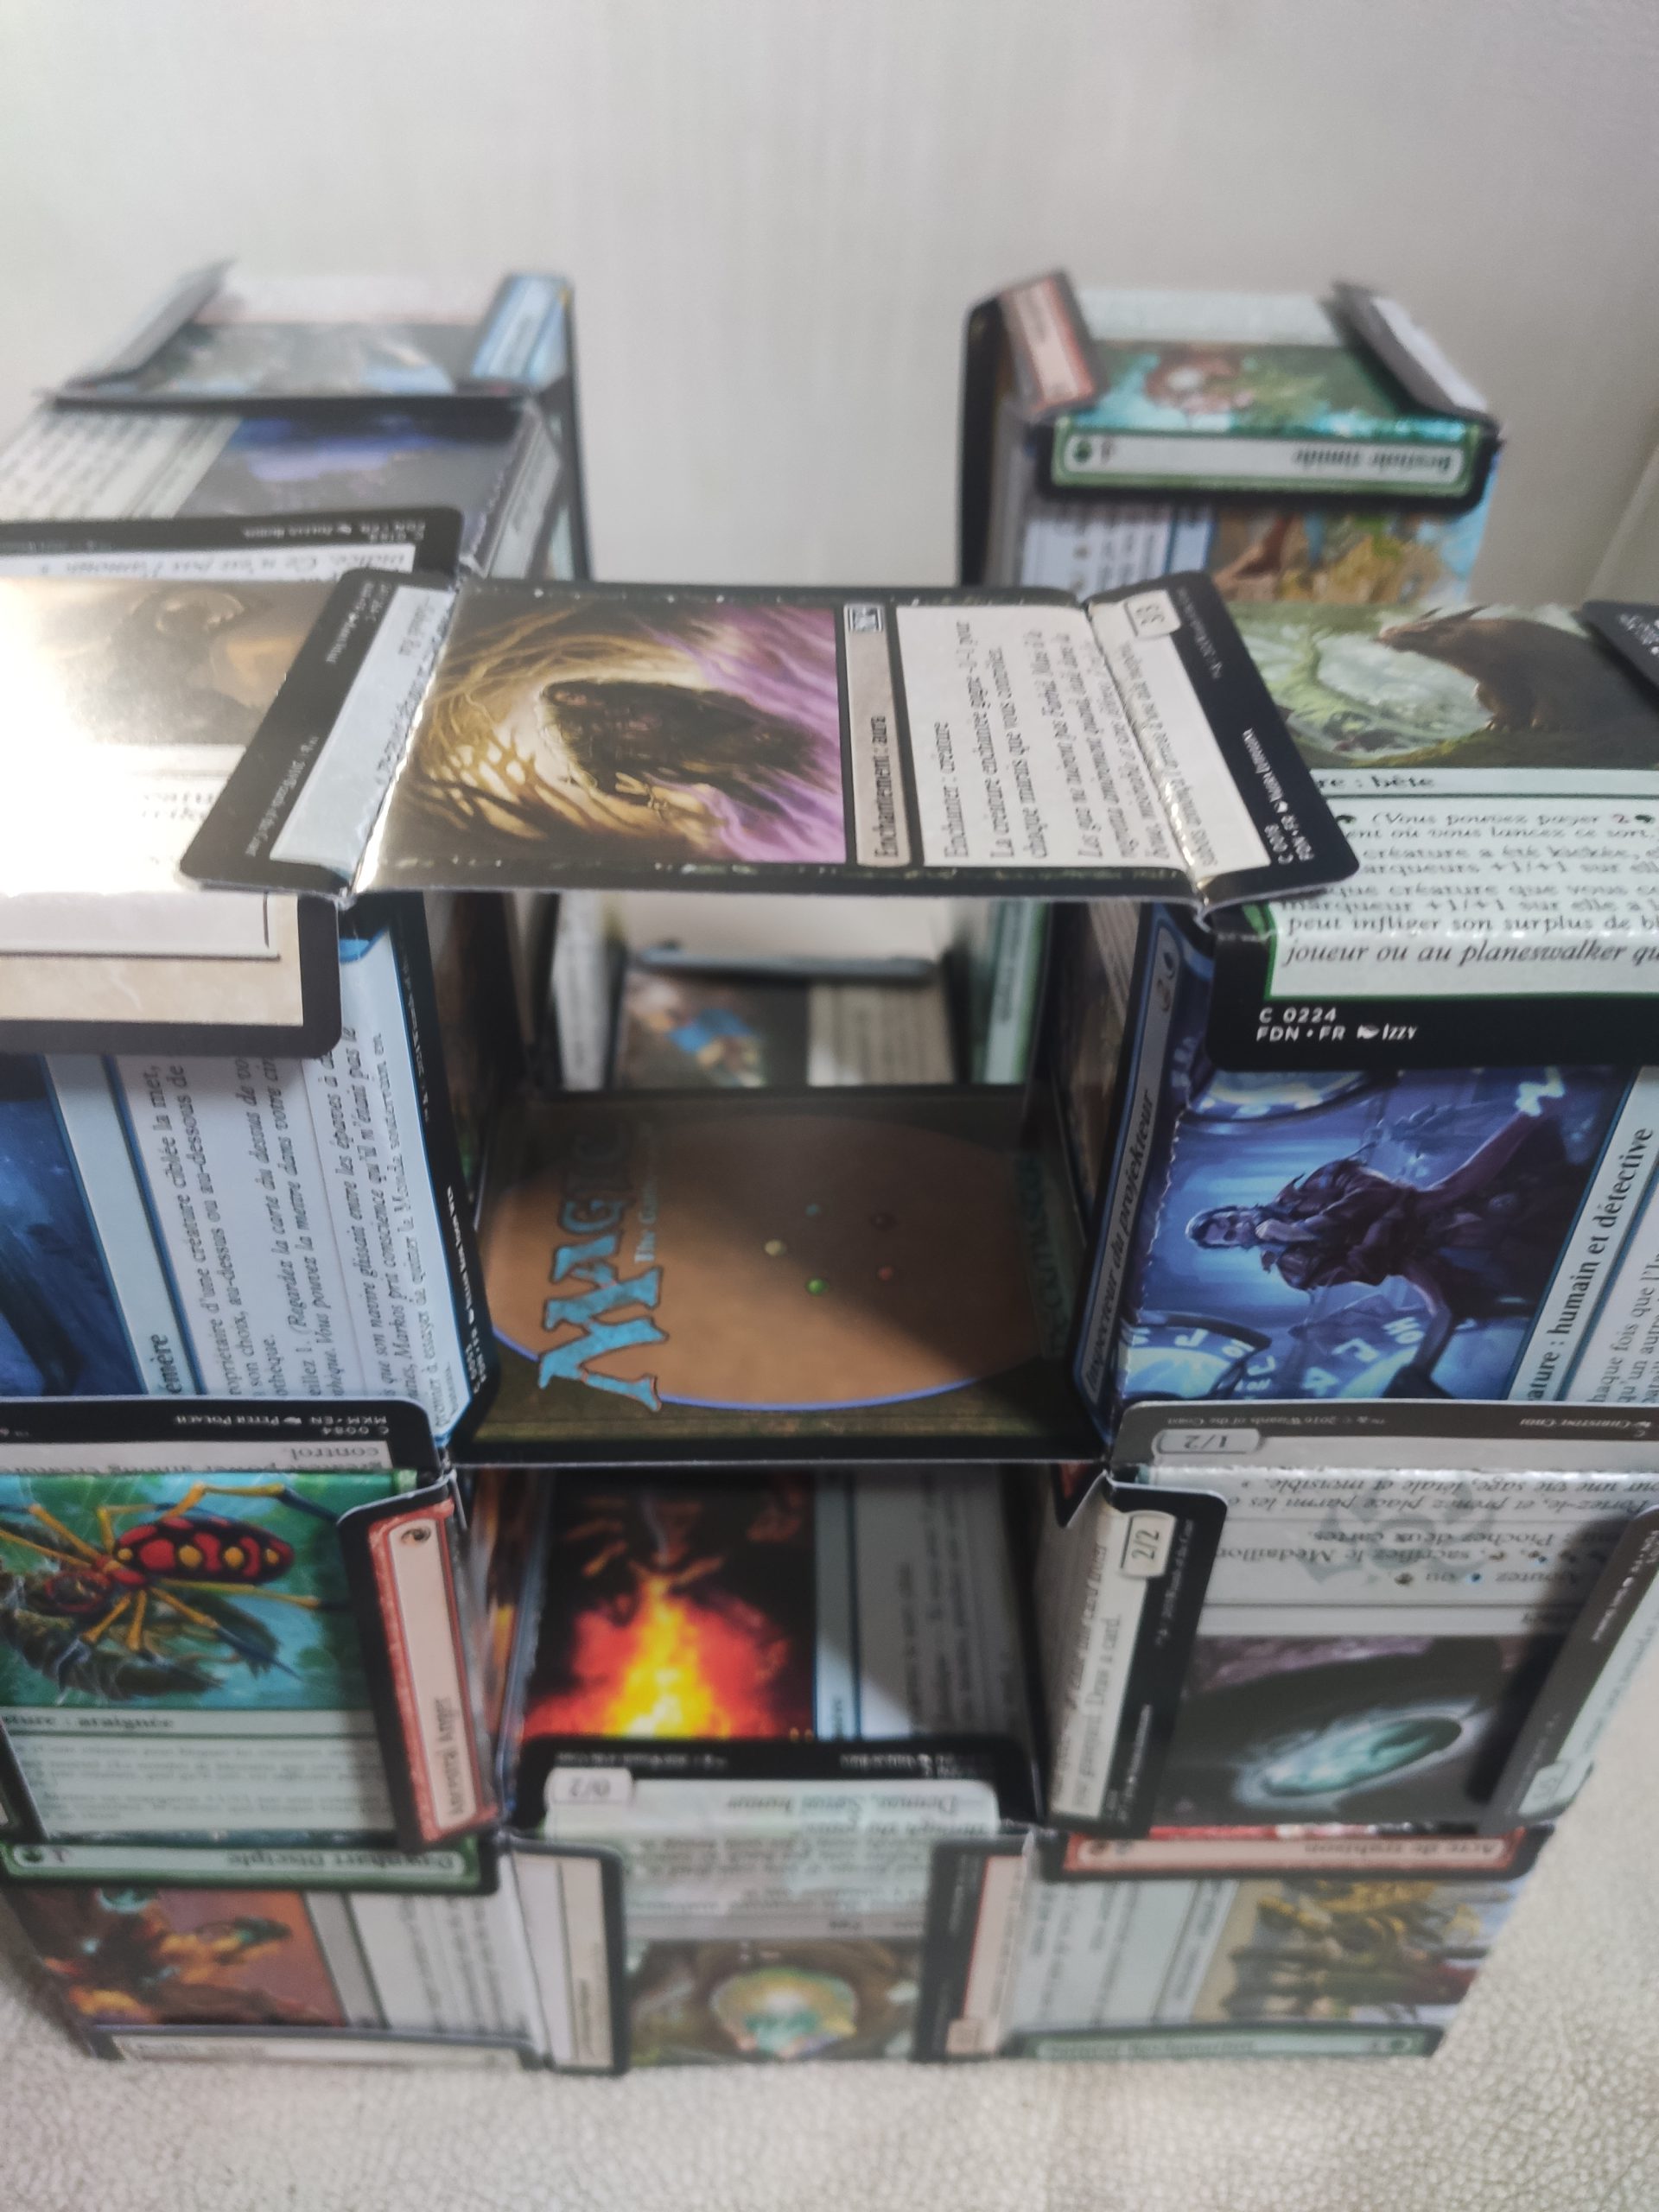
An M1 cube – i.e a cube with a hole in the center of each face – is already a nice achievement. An M2 cube is another story altogether, despite the main concept being the same. Don’t bother, I won’t even consider that here, as it would take 2,400 cards and way more time than I have at hand. And don’t get me started on an M3 cube. Just don’t.
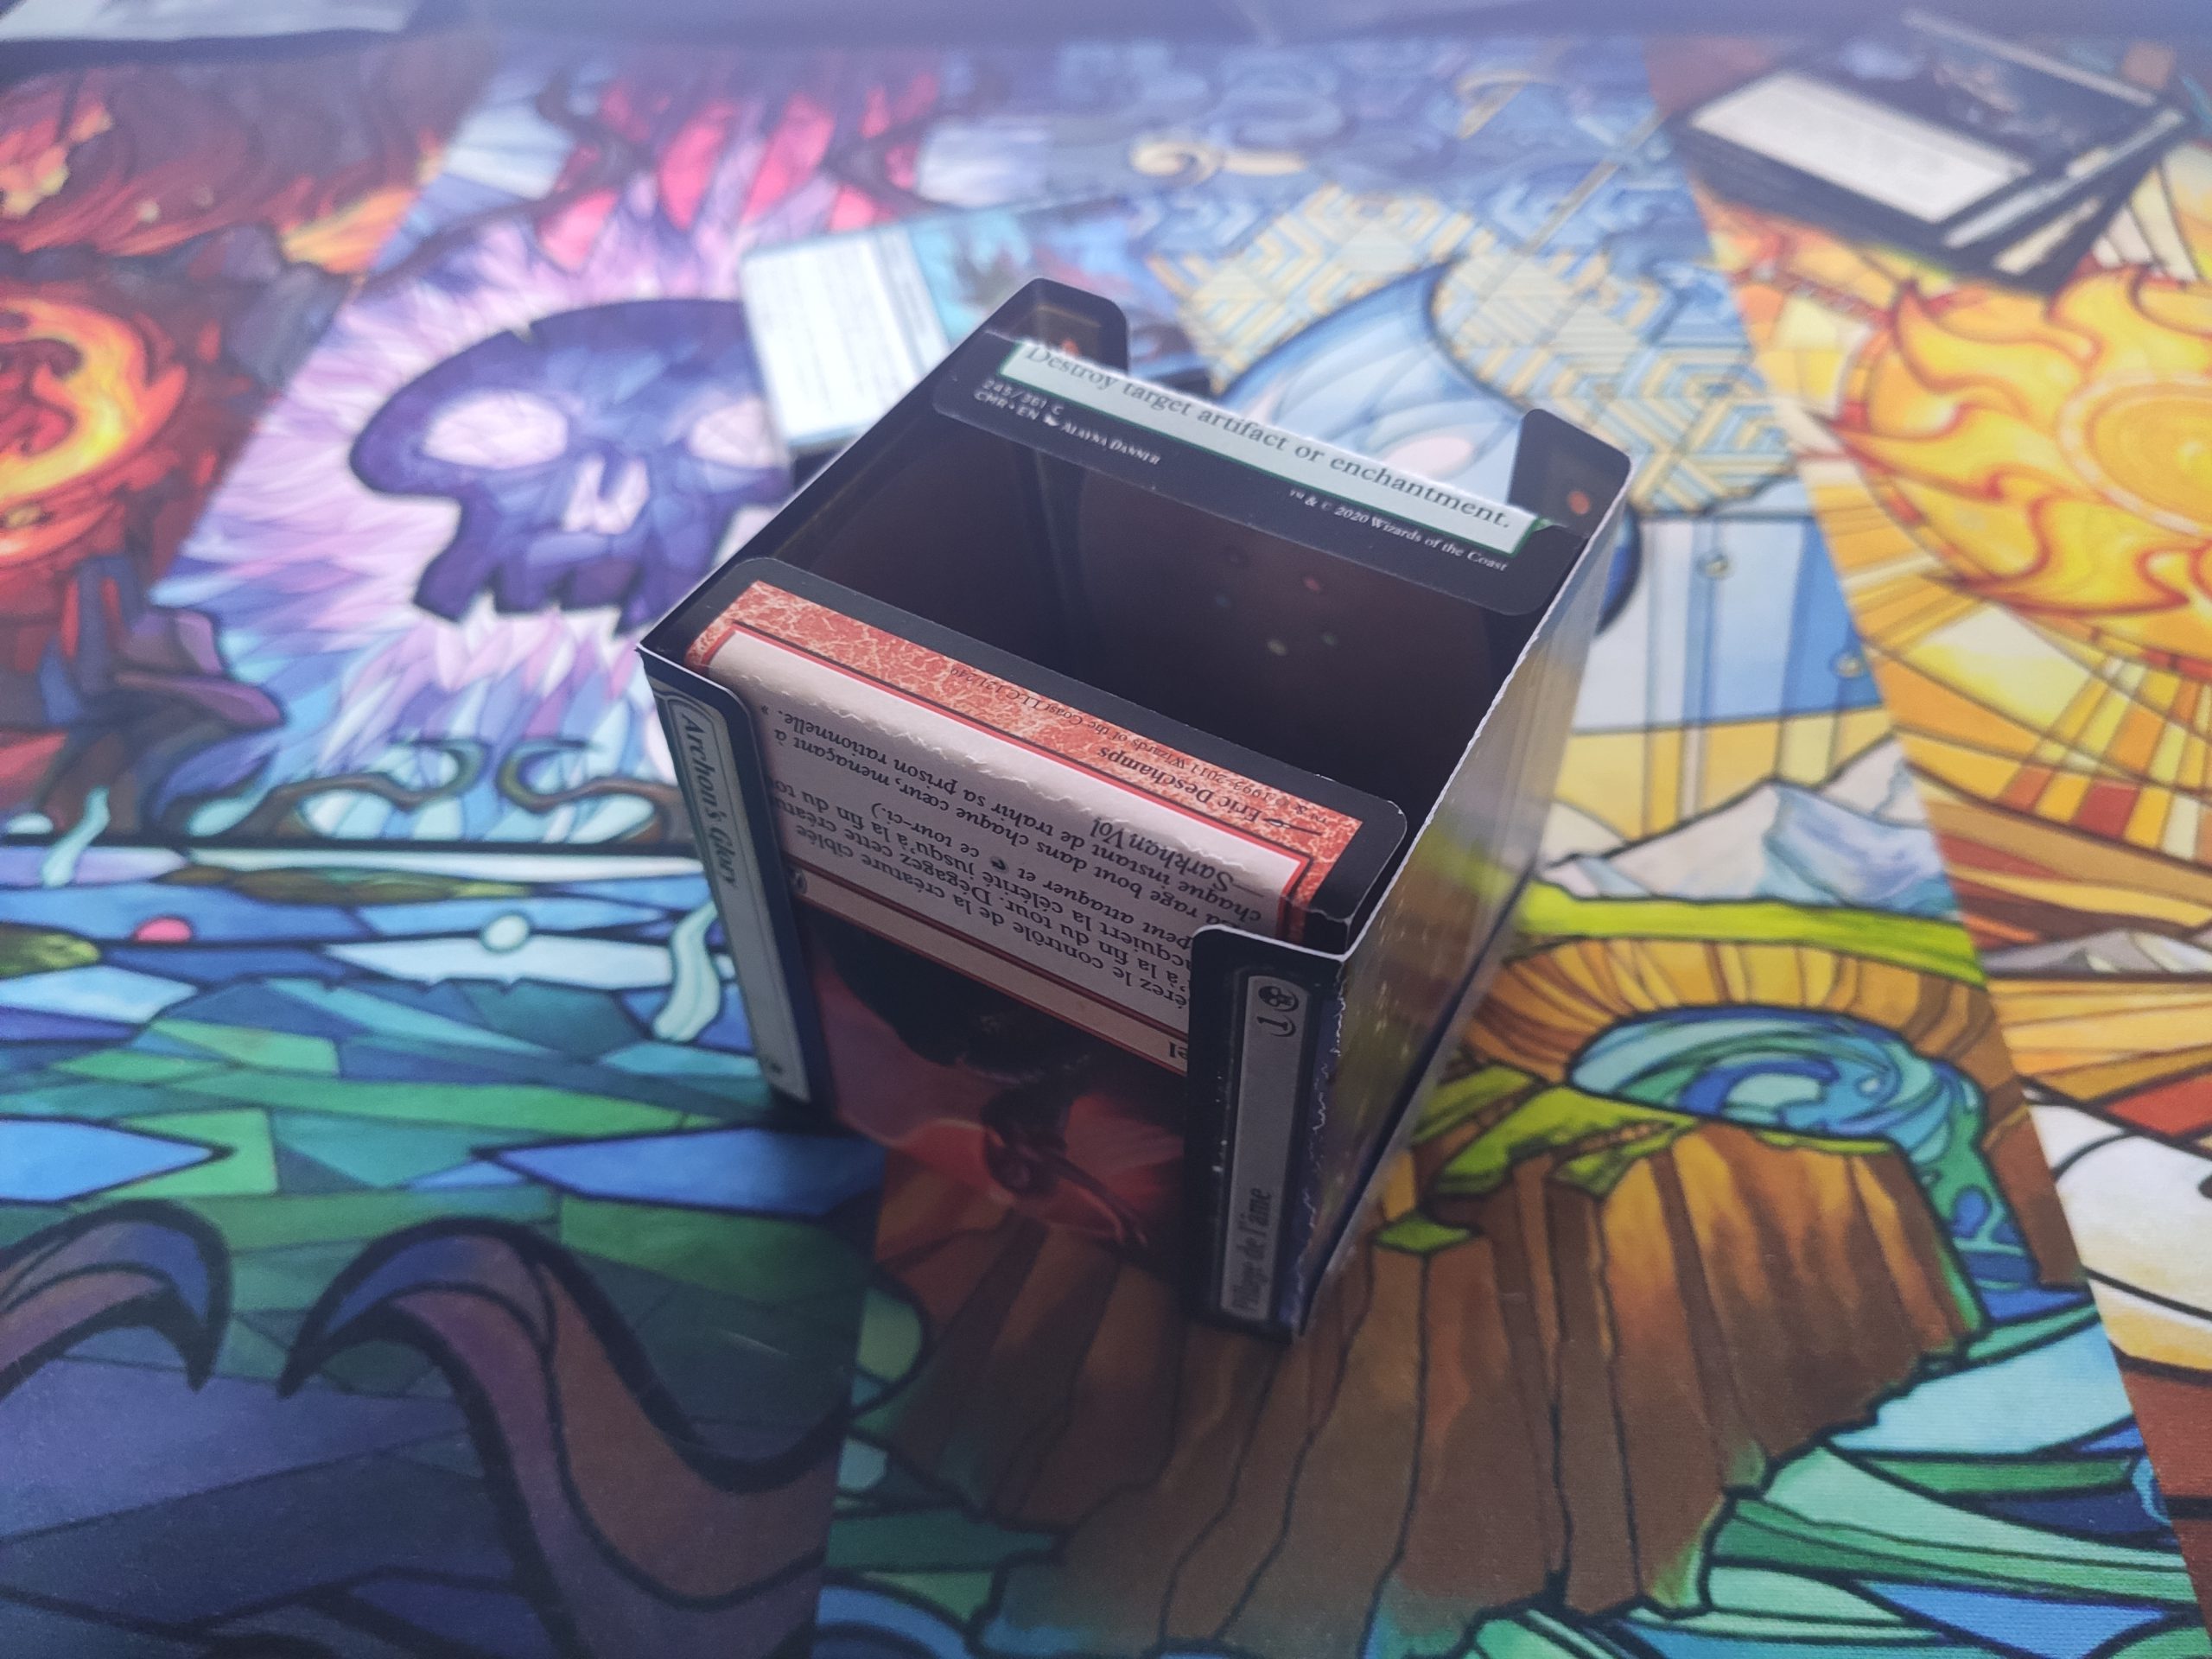
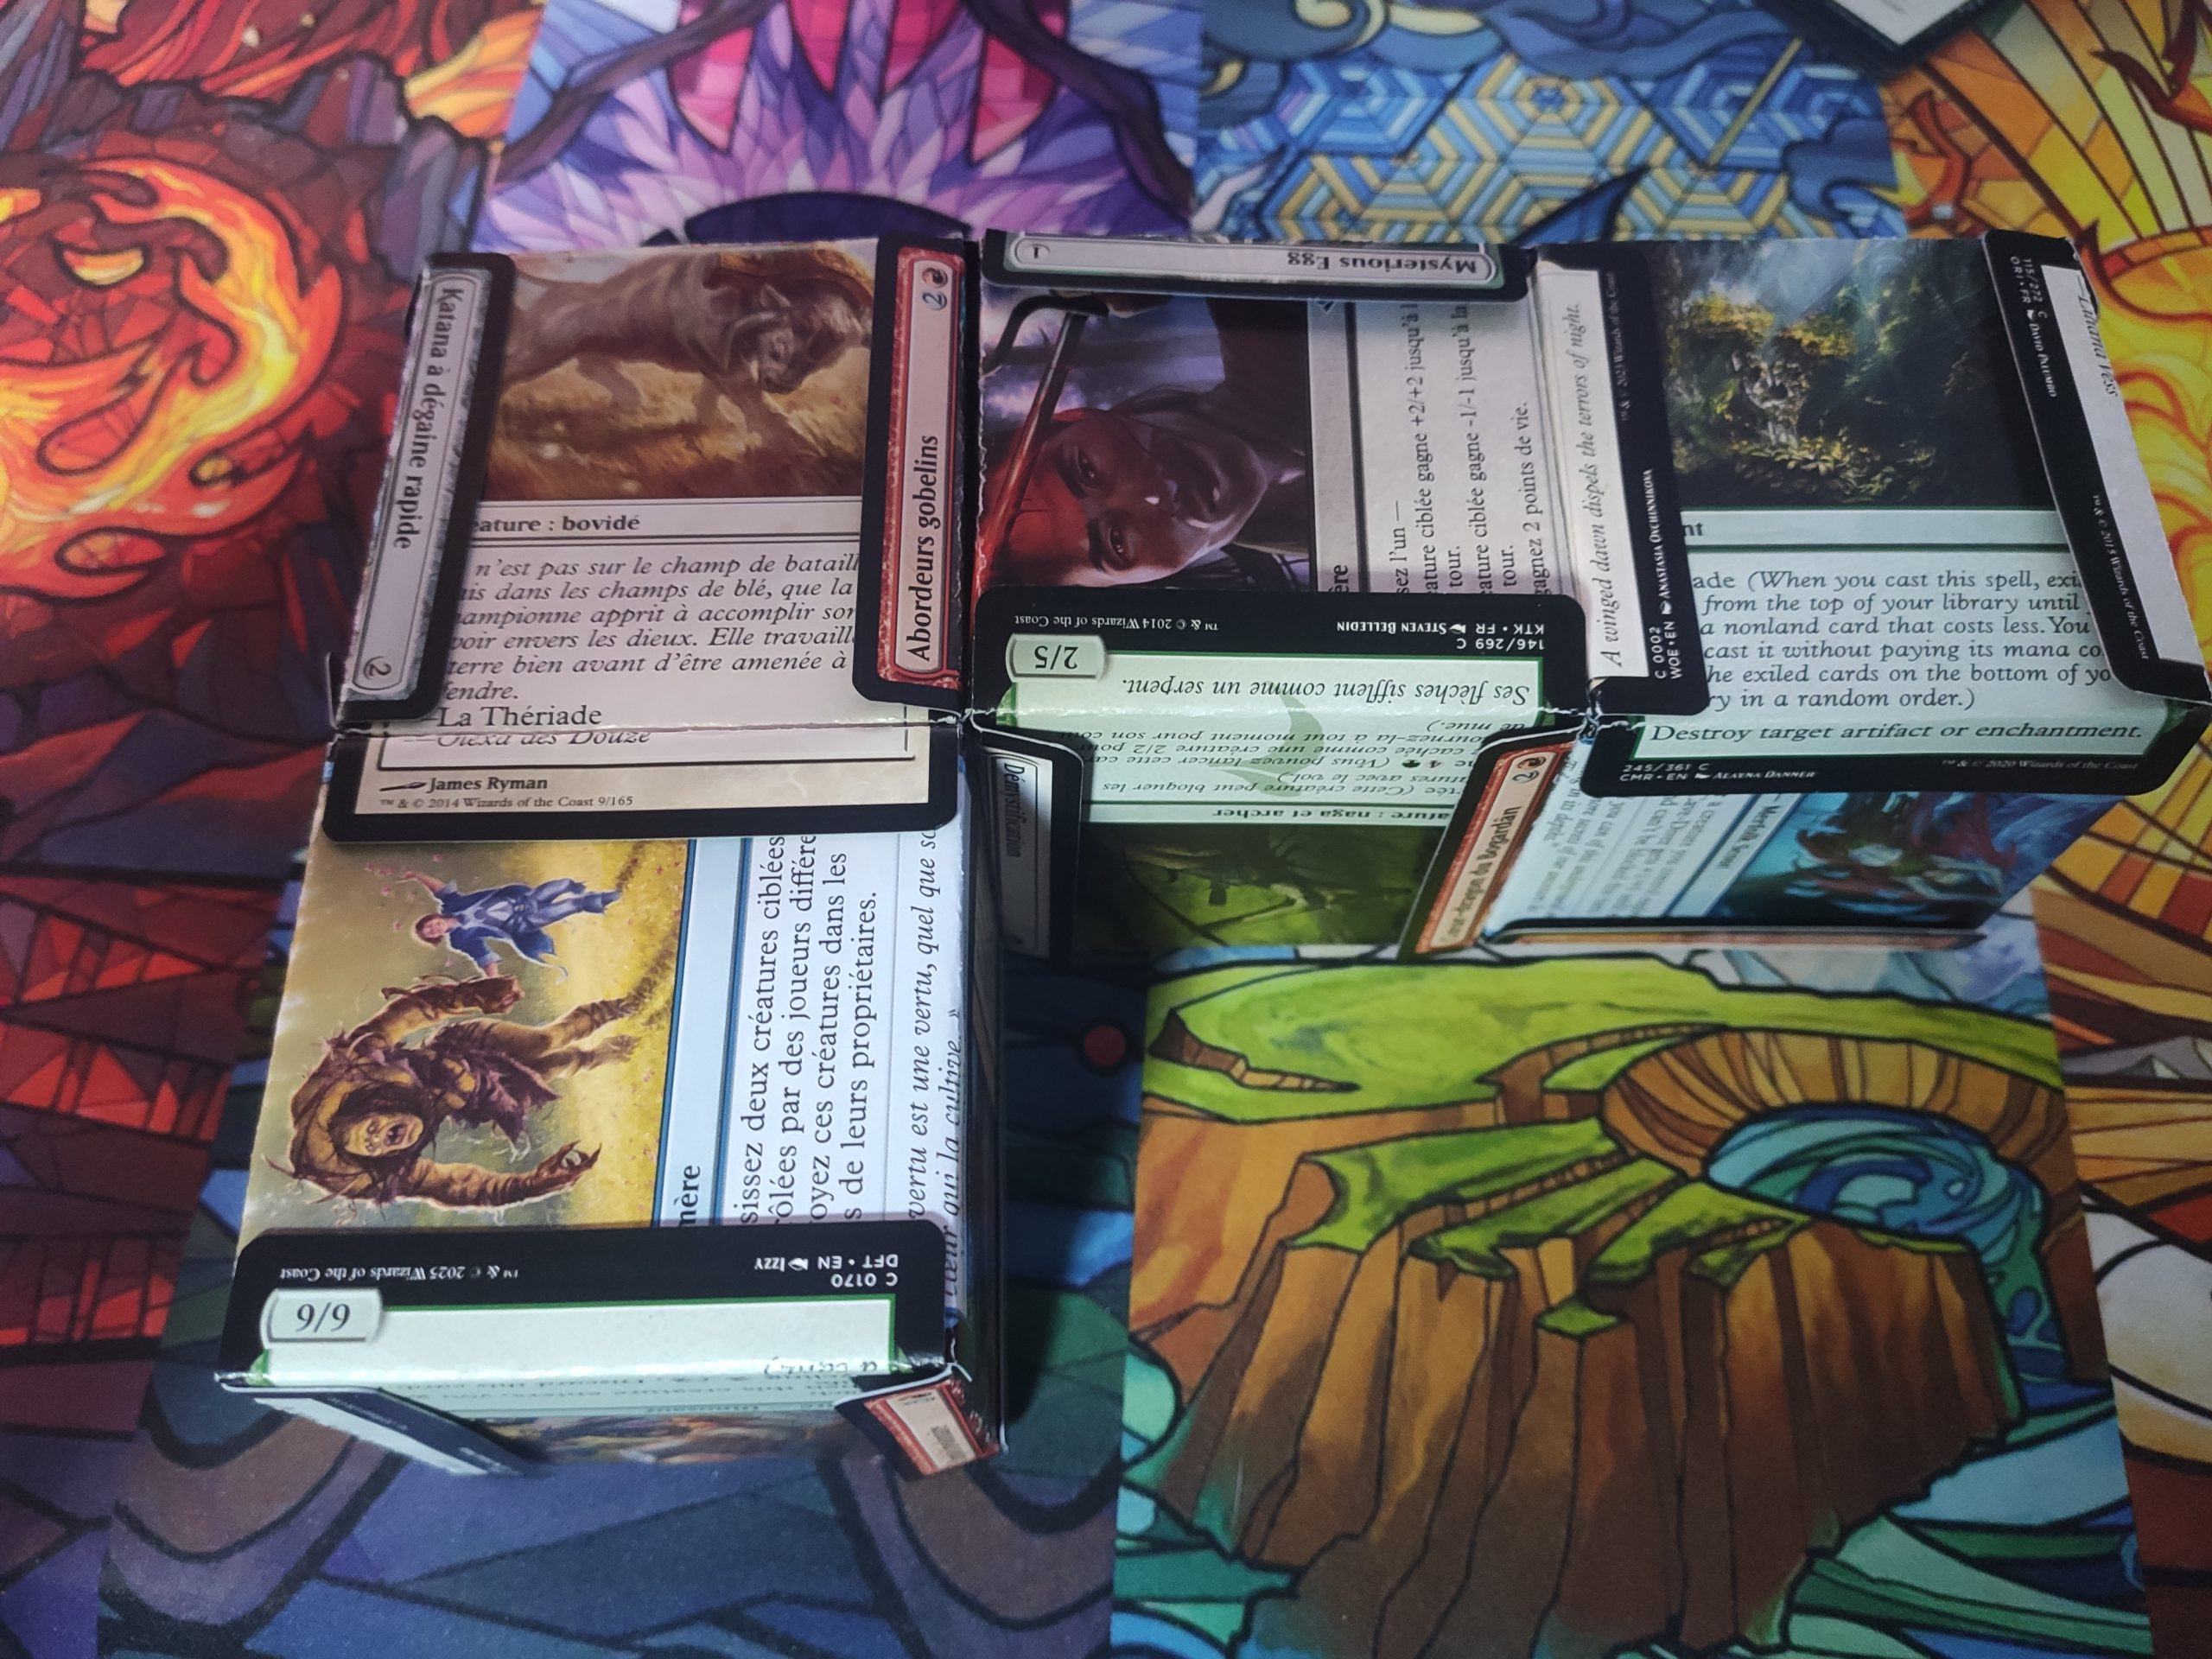
Let’s stick to assembling an M1. To create this contraption, you’ll need to assemble 20 smaller cubes made of 6 cards each.
Step 1 :
Take a card, put it face down on the table, then put another card face up on top of it, trying to make it as equal as possible, just like this:
A good point of reference is trying to align the face up card with the bottom of the Deckmaster blue box on the bottom of the backwards one.
Then bend the card underneath following the borders of the card above, flip your creation, then do it again for the other card.
It’s not as easy as it seems. Magic cardboard does not like being twisted this way and that, so be firm while making the creases. Don’t worry if your cards don’t align perfectly or if the bends are not perfectly horizontal, it should work out fine in the end.
Your cards should now look like this:
Repeat the process until you have 6 bent cards.
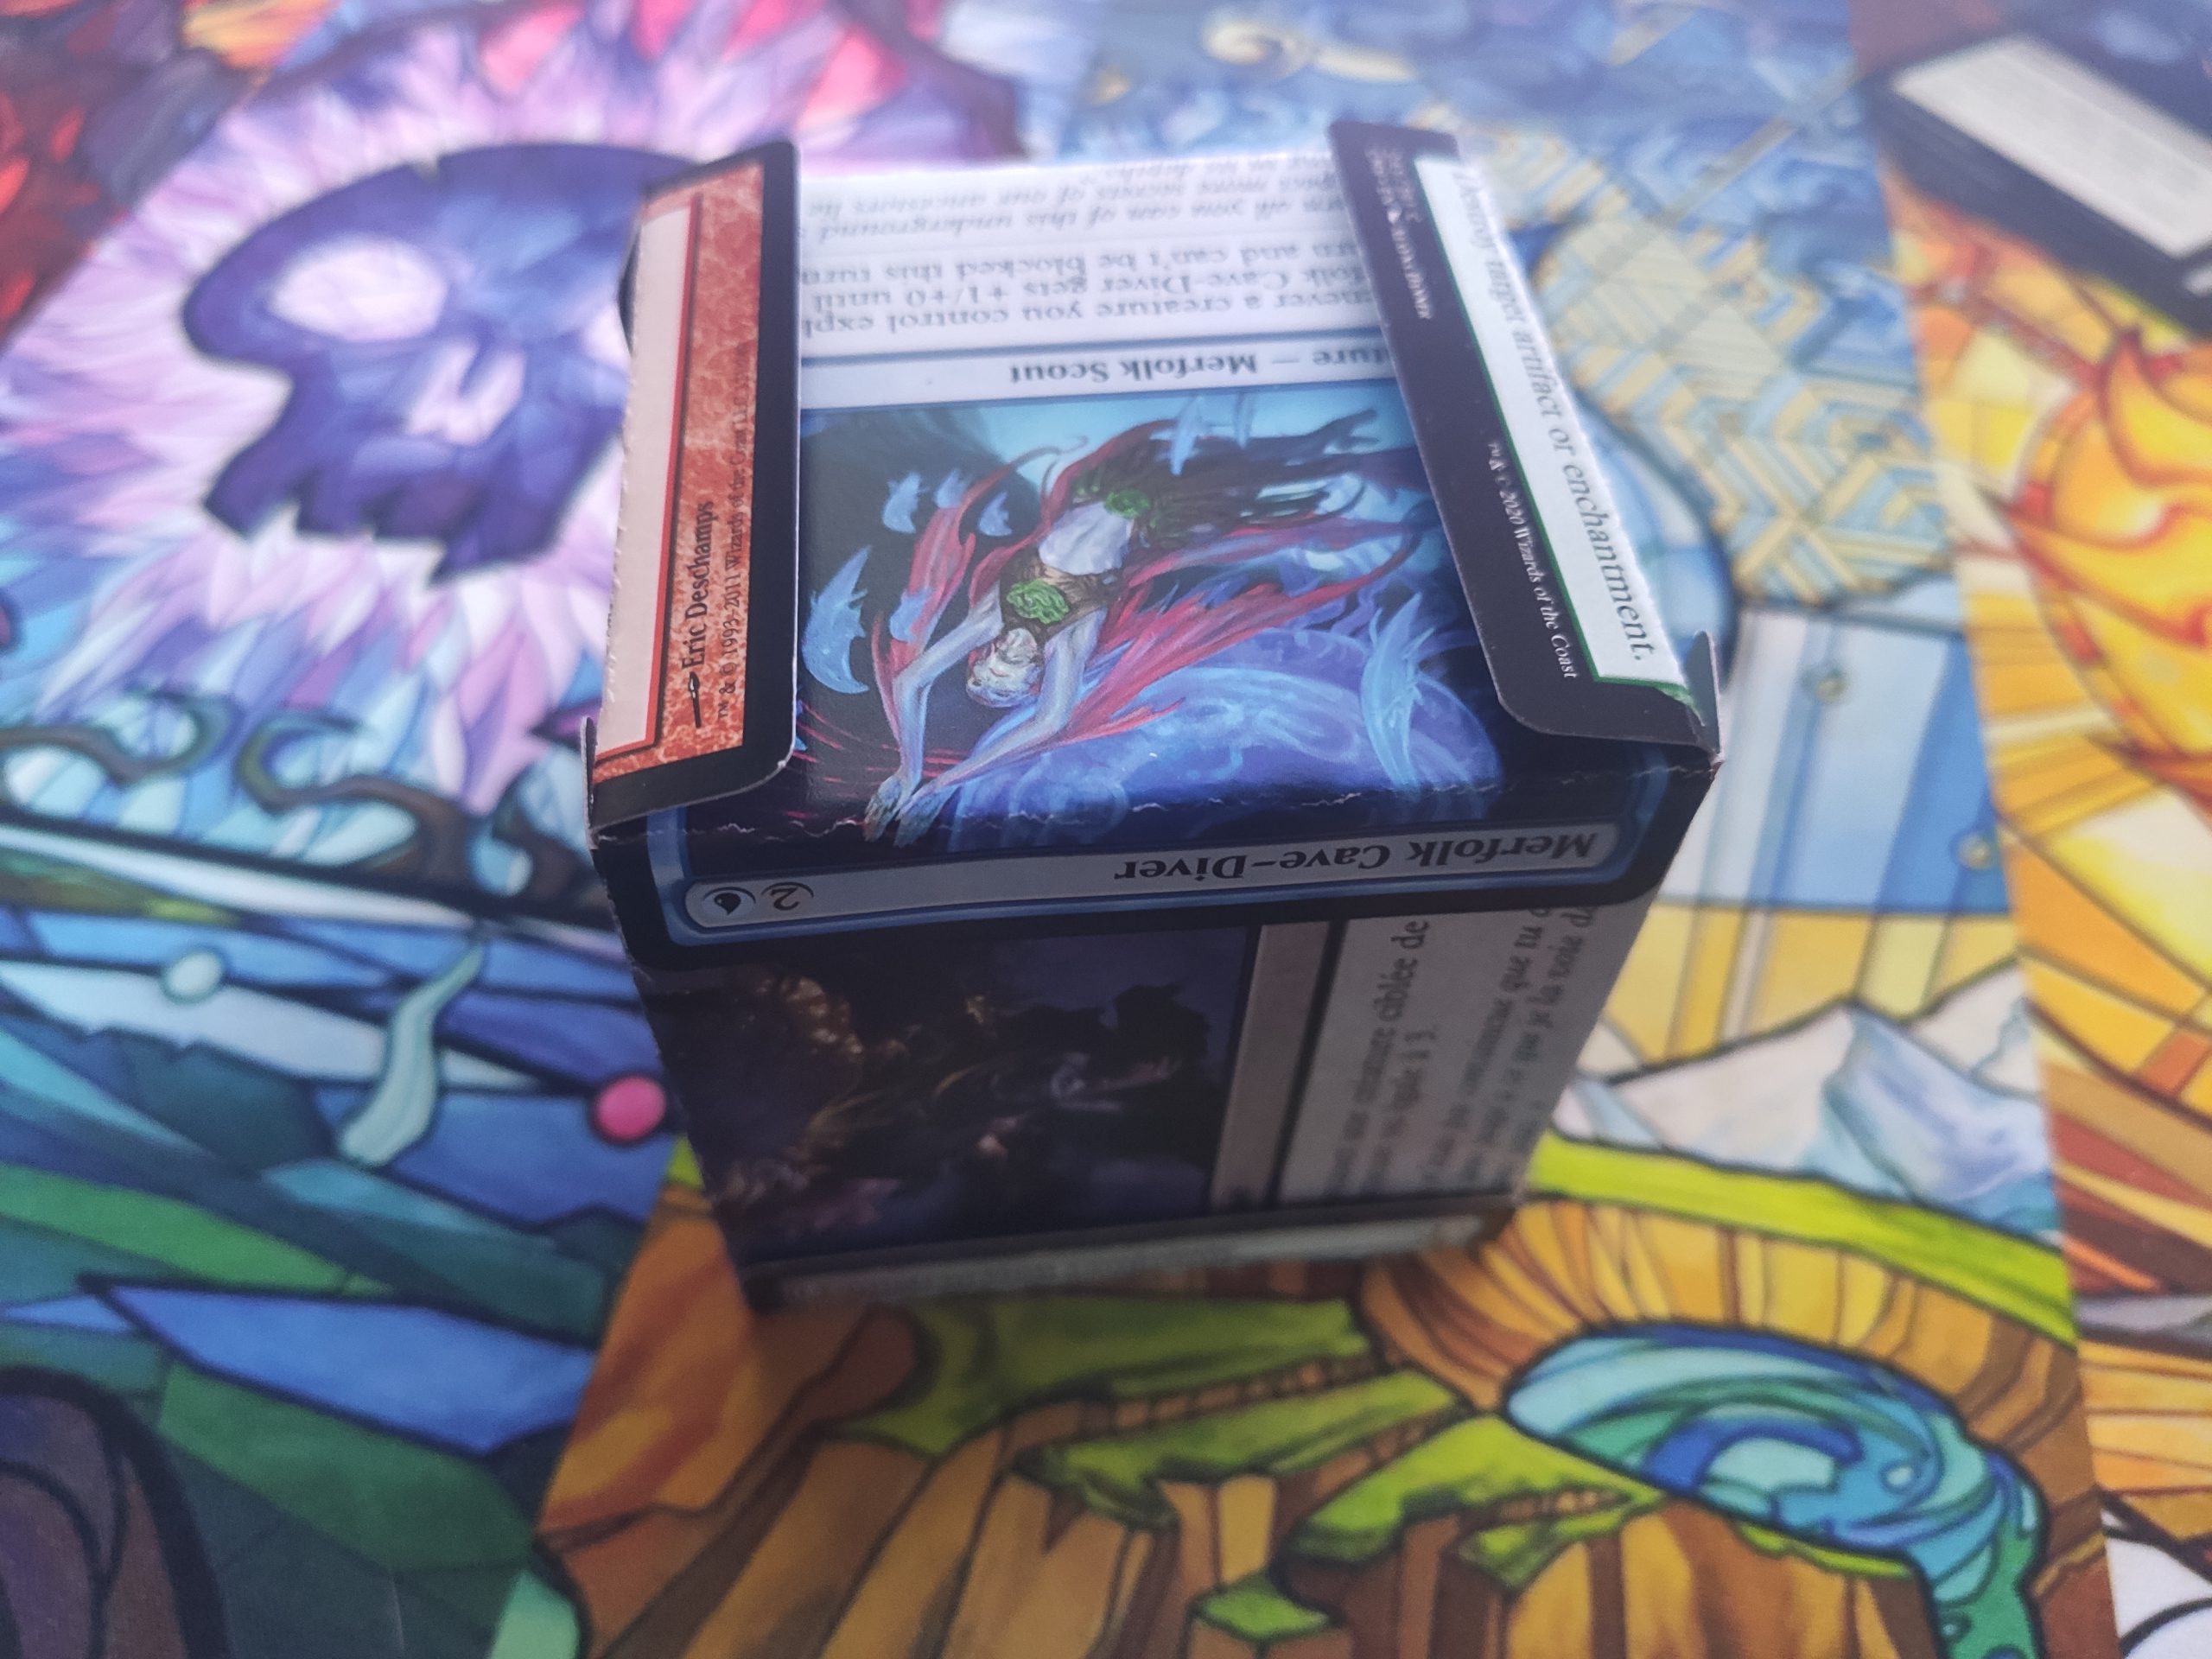
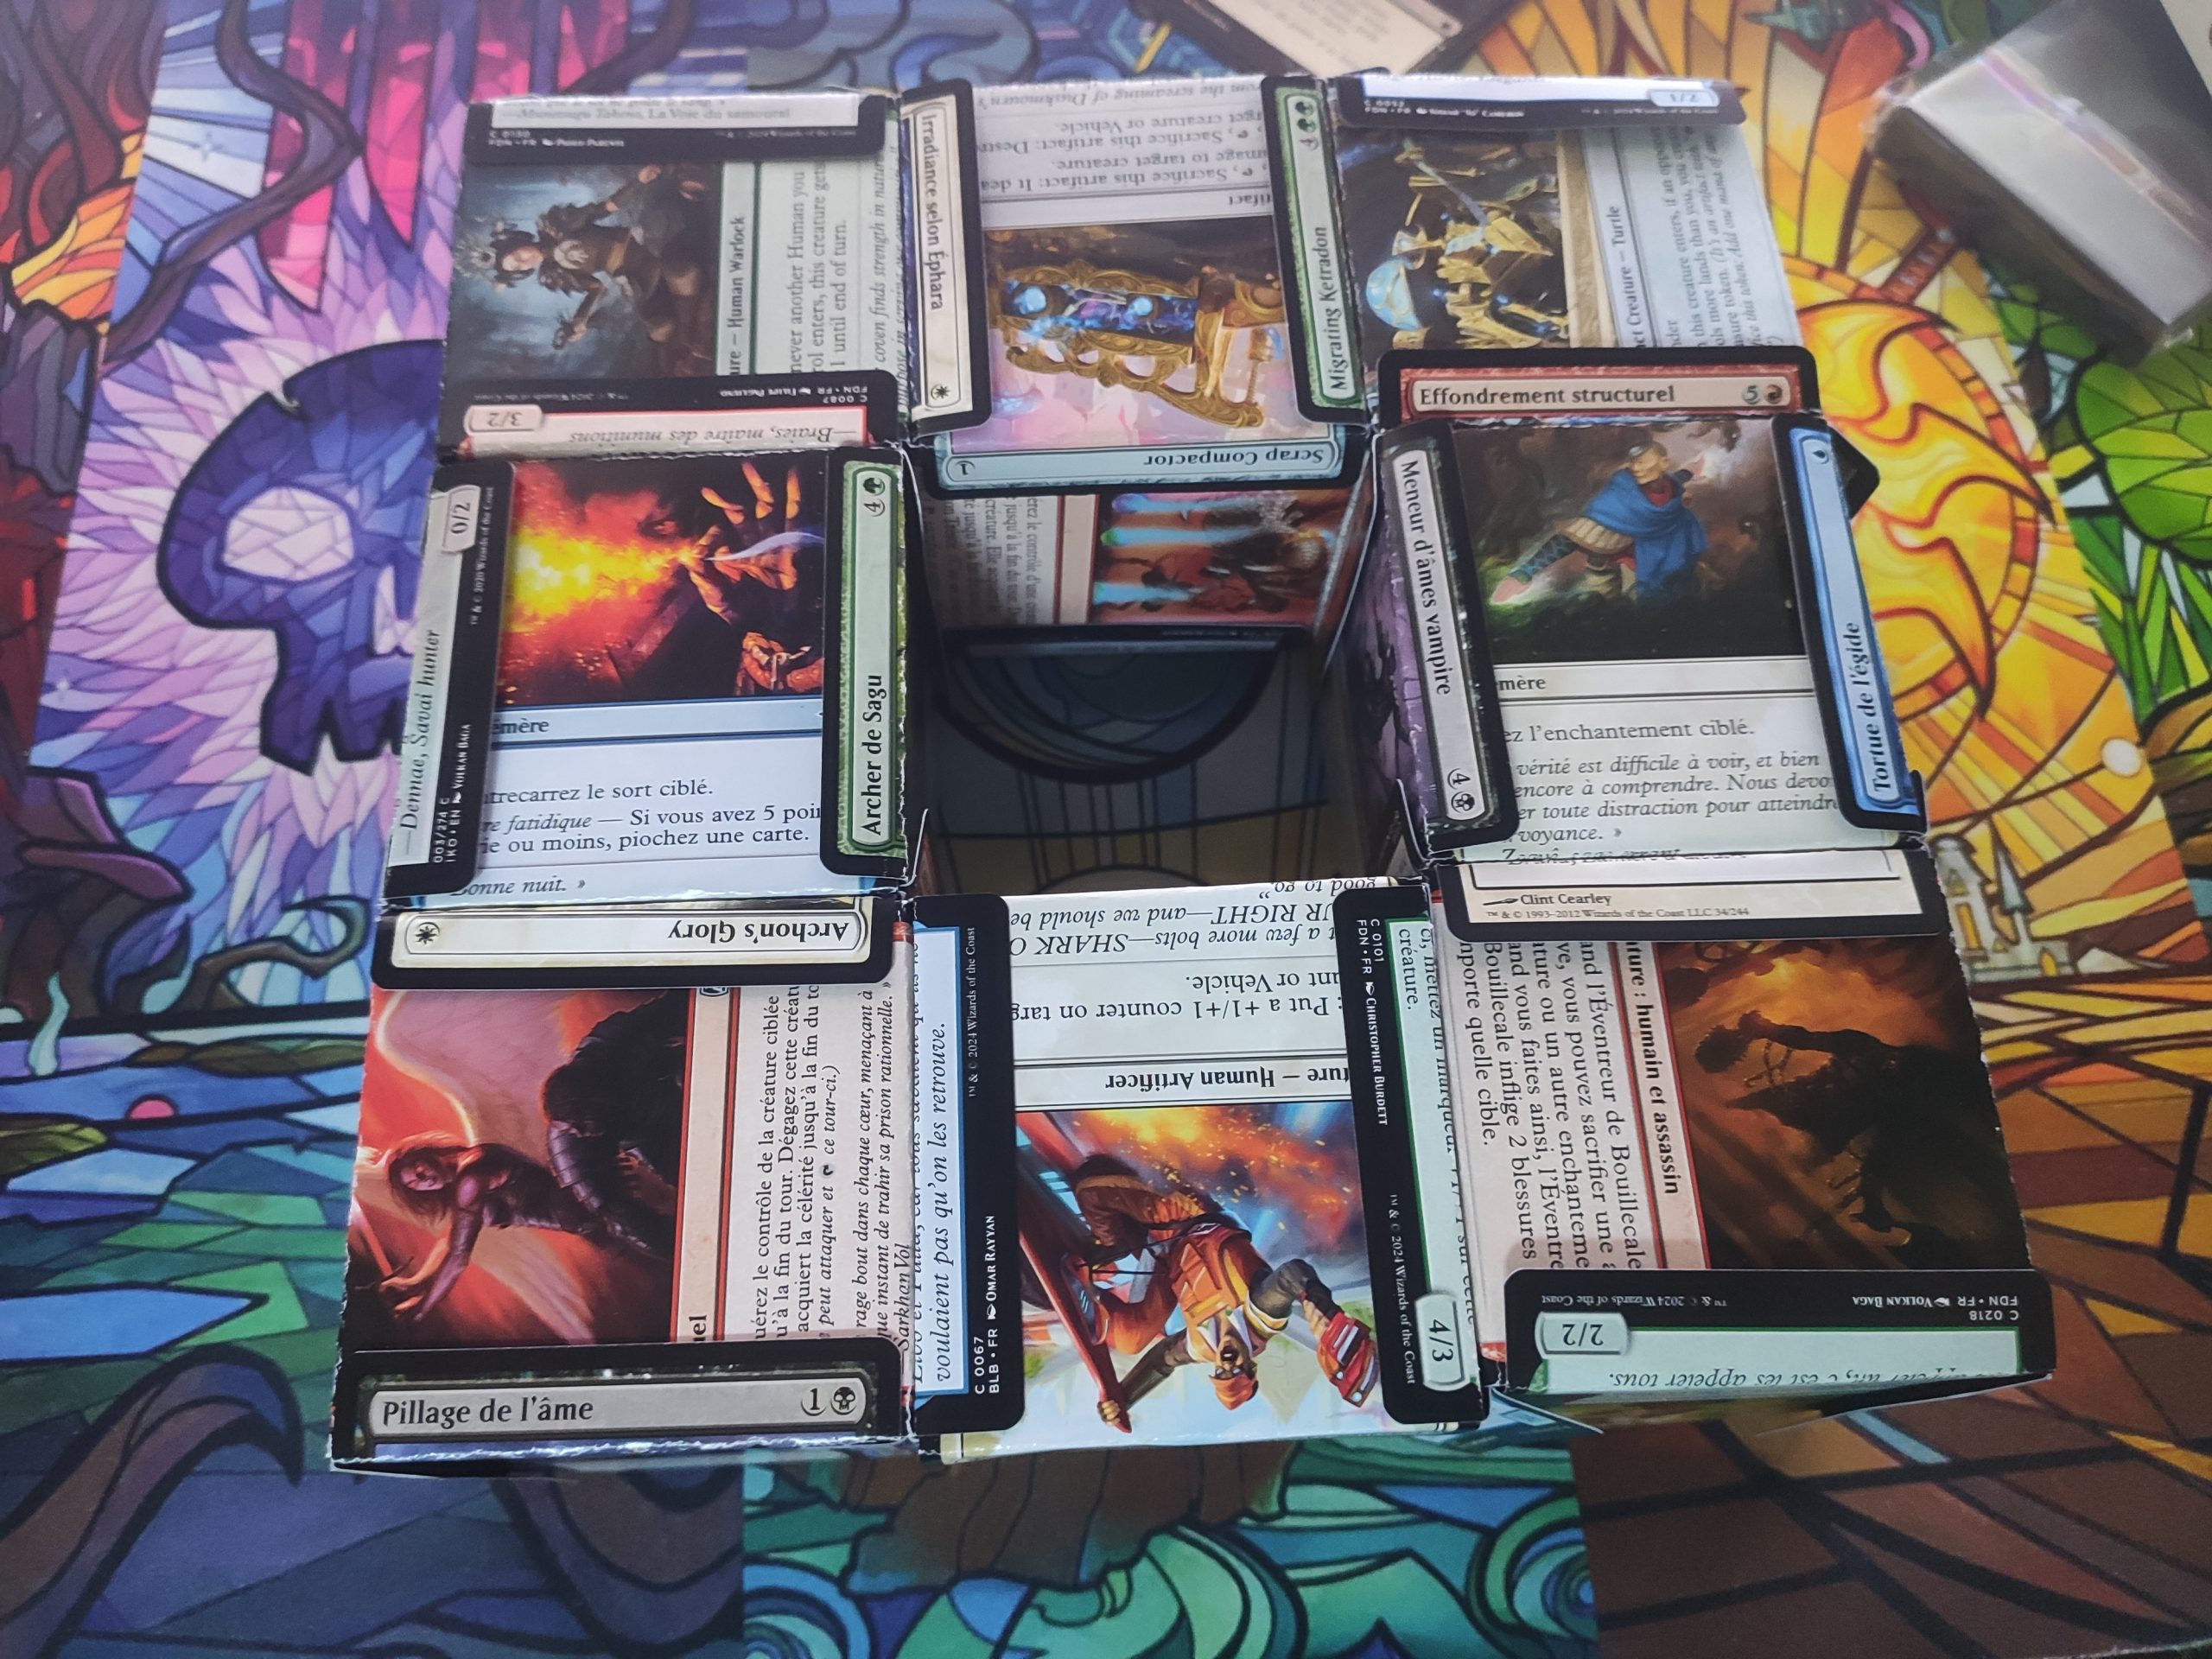
Step 2:
Put a bent card on the bottom, legs up. Slide two other cards upright underneath the first one, on each of the non-legged sides.
Then take another two and slide them on the missing edges, but with the legs on the side instead of top and bottom, snuggling the upright cards that are already in. The legs of the bottom card should hold them in place.
Finally, you need to insert the last piece by bending the tabs on top a bit. This is one of the two tricky parts of the build, but with a little tweaking and wobbling, it should settle just fine. Just raise one of the tabs a bit, slide the card in, and lower said tab back. Trust me, it’ll get easier. Eventually.
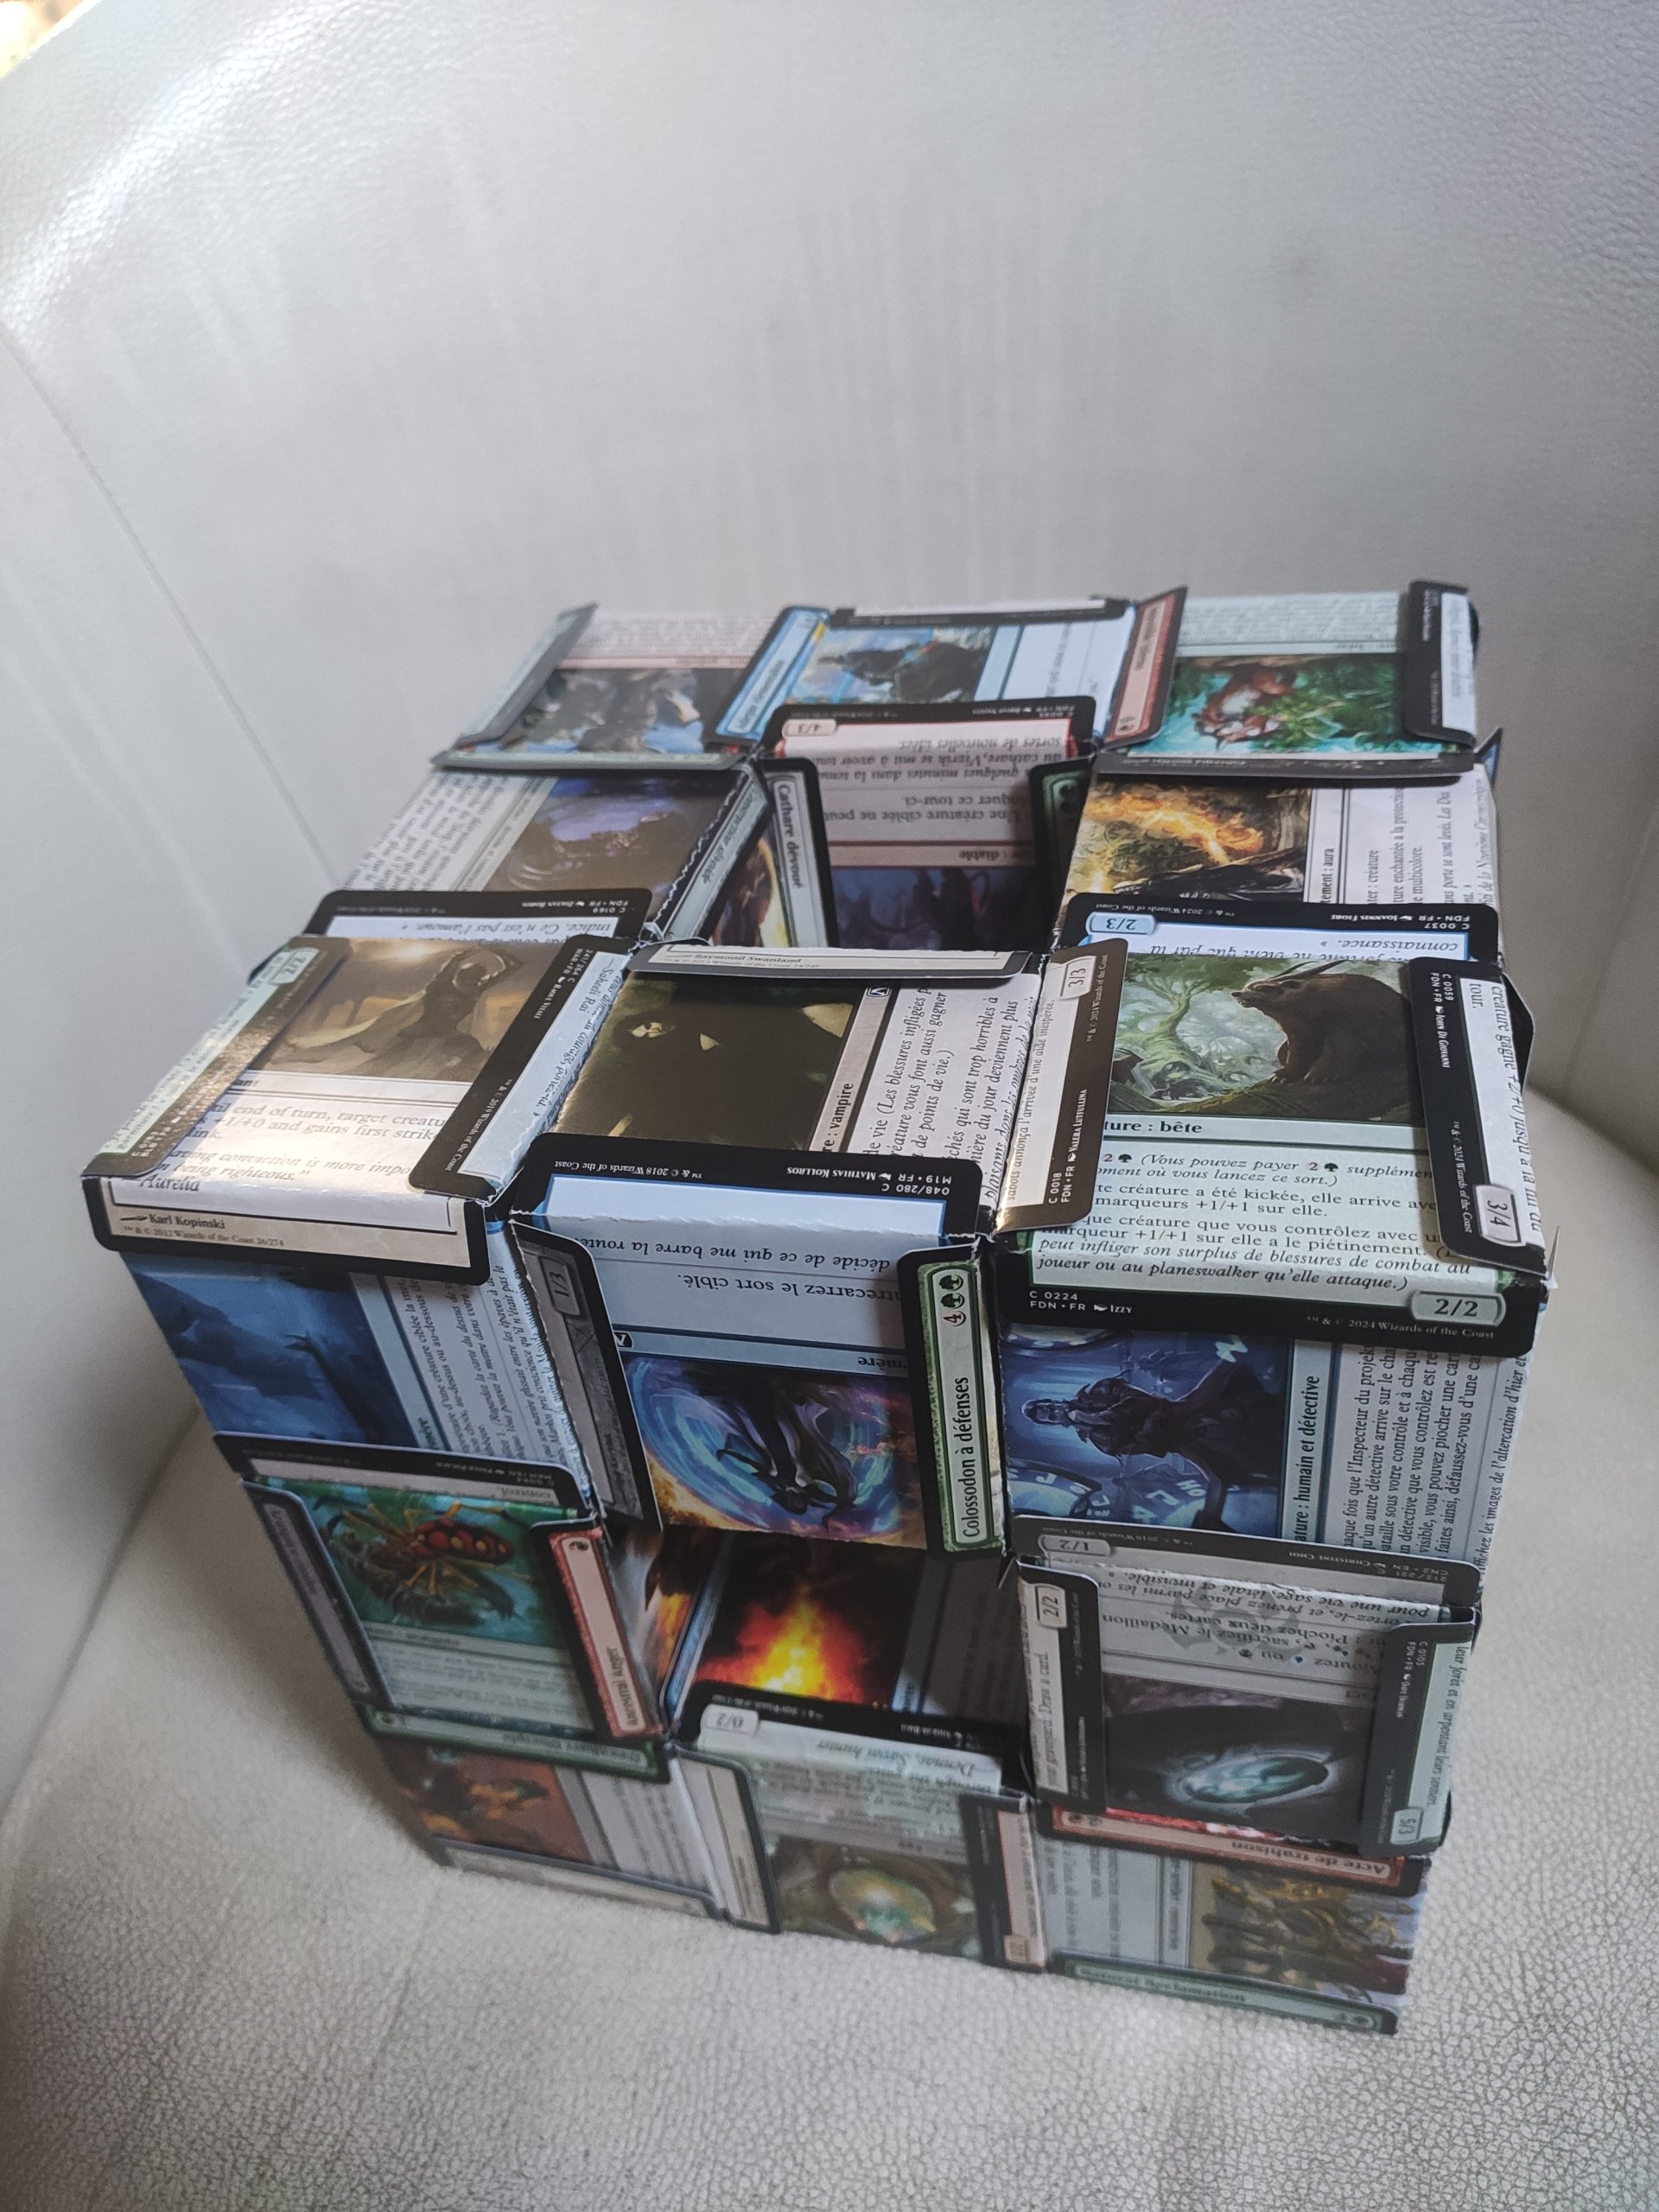
This is what you should end up with. Congratulations, you just made an M0 Menger Sponge!
Rinse and repeat another 19 times. Go ahead, I’ll wait.
There, this wasn’t so hard, was it? (yes)
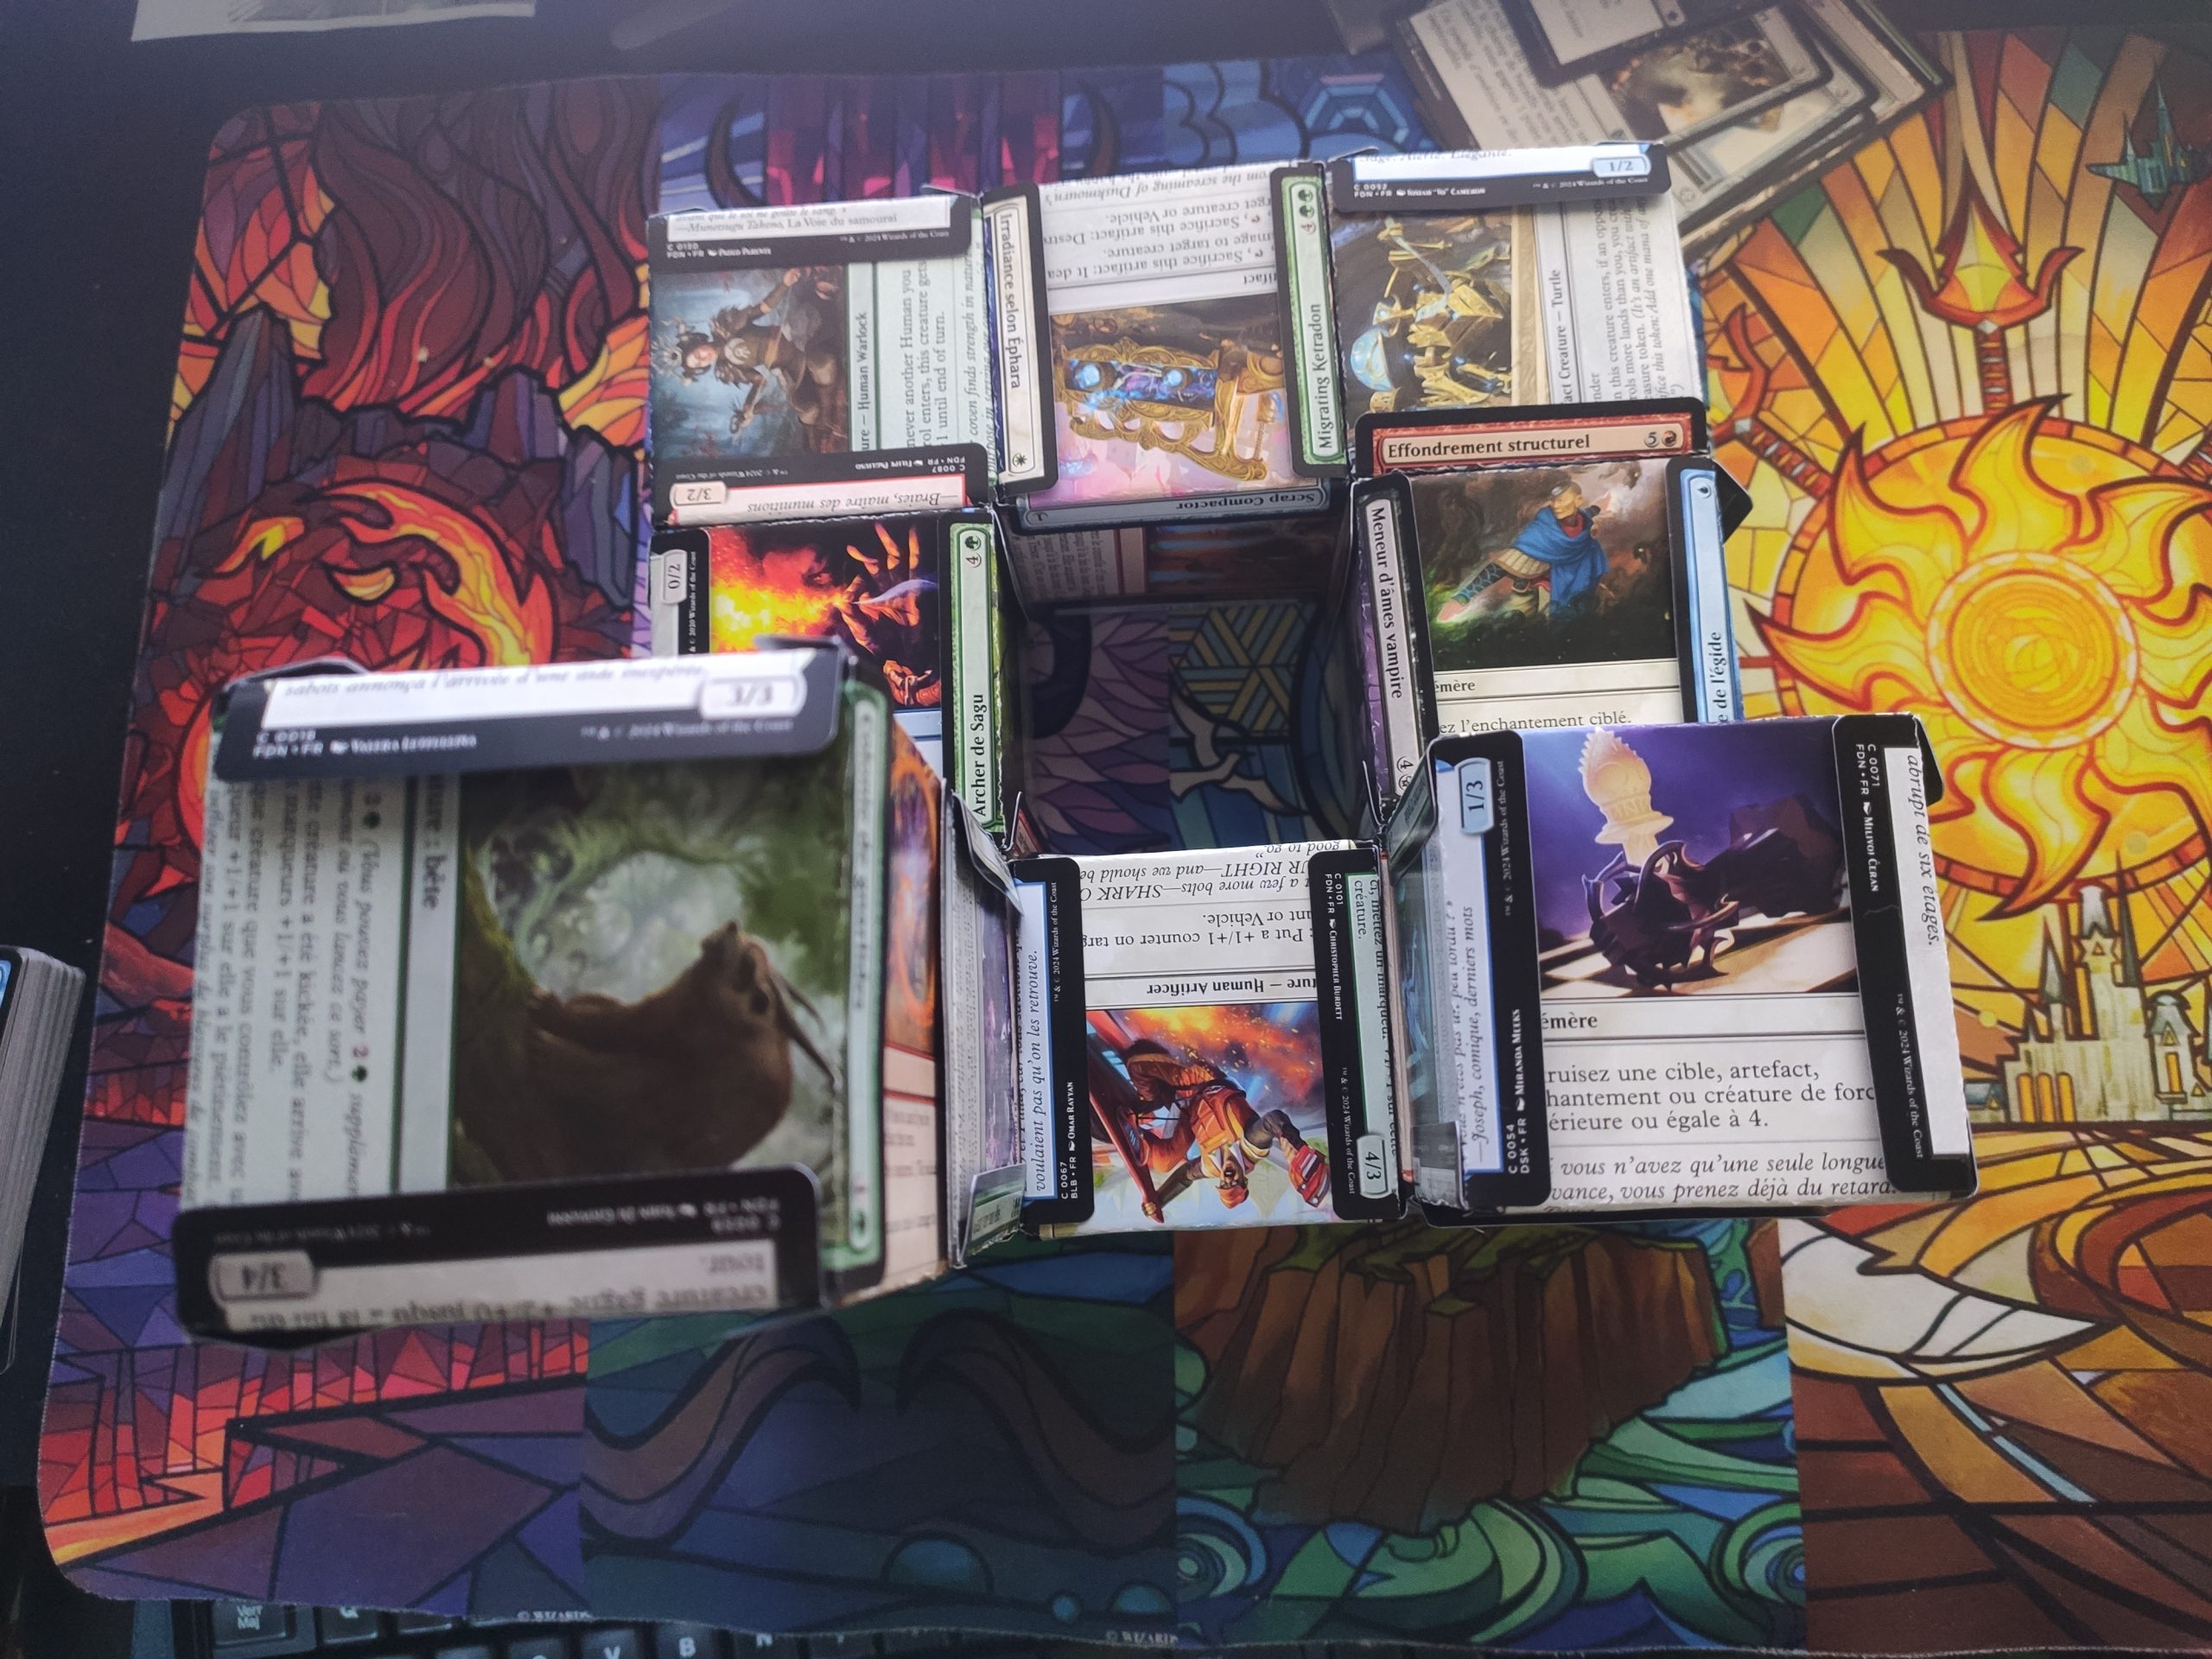
Step 3:
This last part is all about assembling the cube.
Thought that all of this folding and prying was hard? Think again. This is where the truly challenging endeavour begins.
First, take two cubes and link them together. To achieve this, slide one of the tabs underneath the ones opposite to it. This is the easy part.
The hard part is managing to get the tab on the other side to slide in its counterpart without breaking your cube.
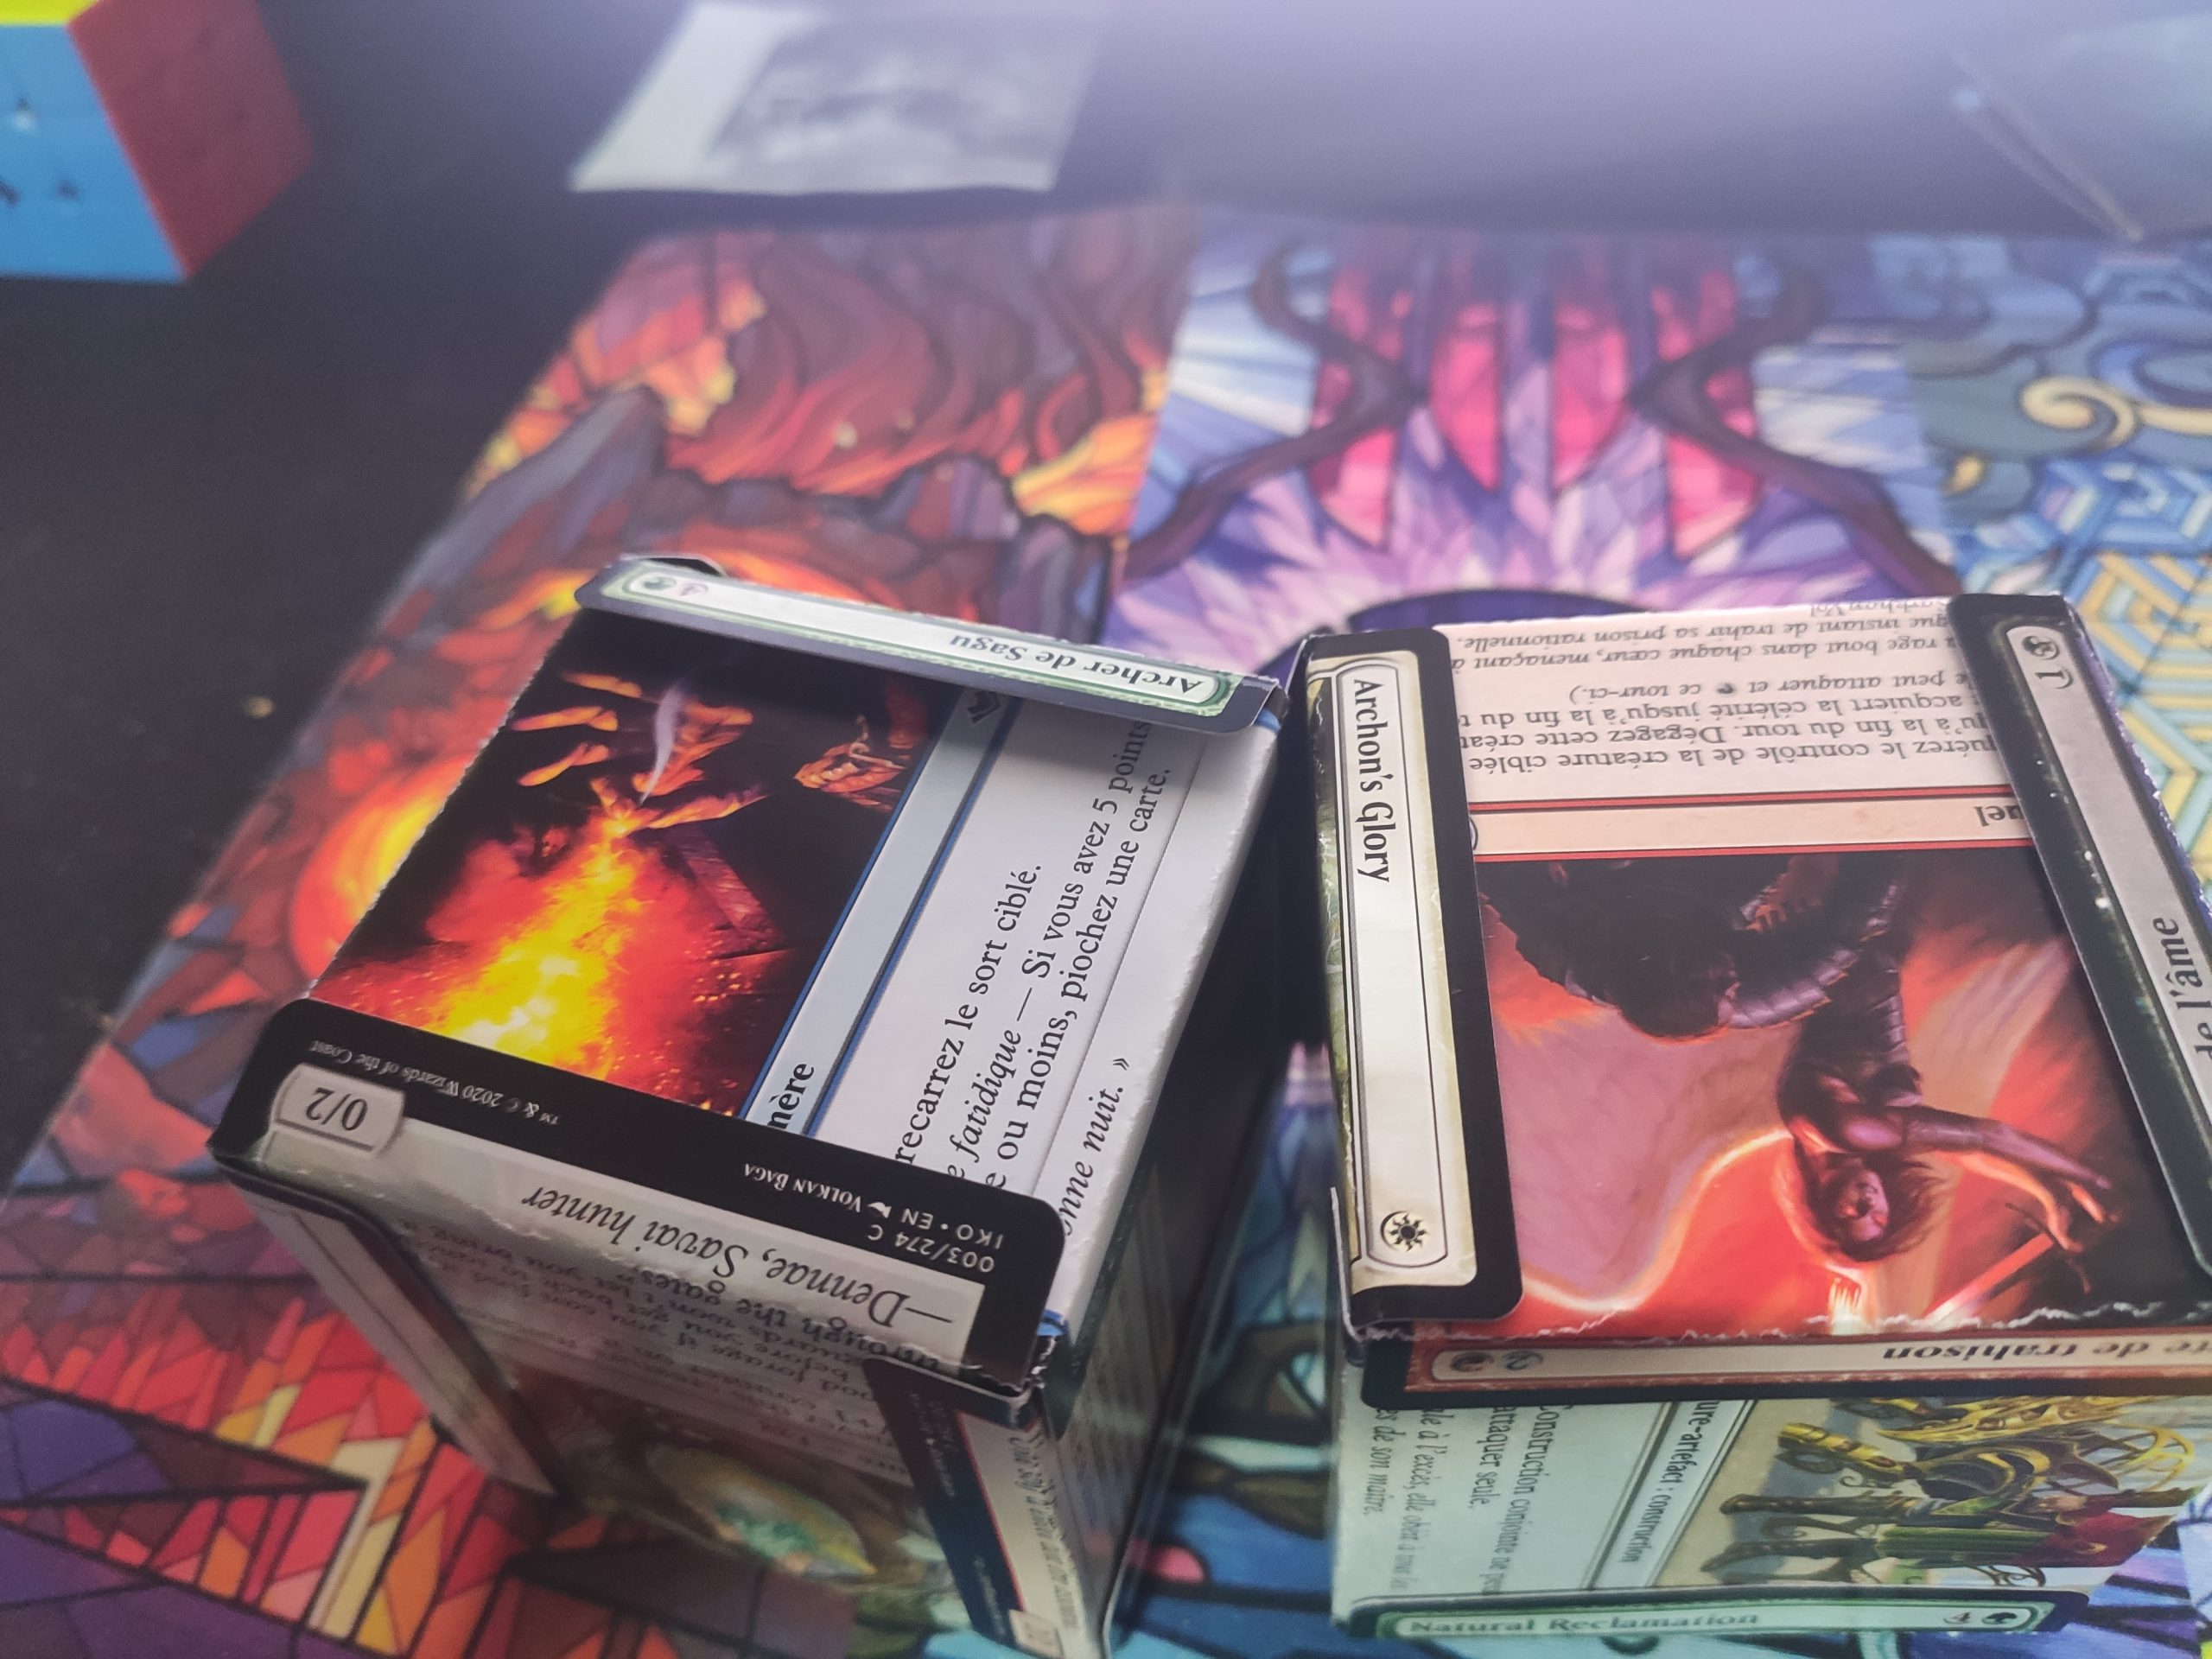
There is no easy way to detail the process. What I ended up doing is sliding one side in, then insert the other side one tab at a time. This is somewhat precision work, so don’t be too surprised if you fumble it and disassemble one of the cubes in the process.
It’s a bit hard to explain properly, there is no easy way to do it, and sadly, we’re going to do that a lot. And even sadder, it gets harder the more cubes you slide in.
At this point of the build, you should have something that looks like this:
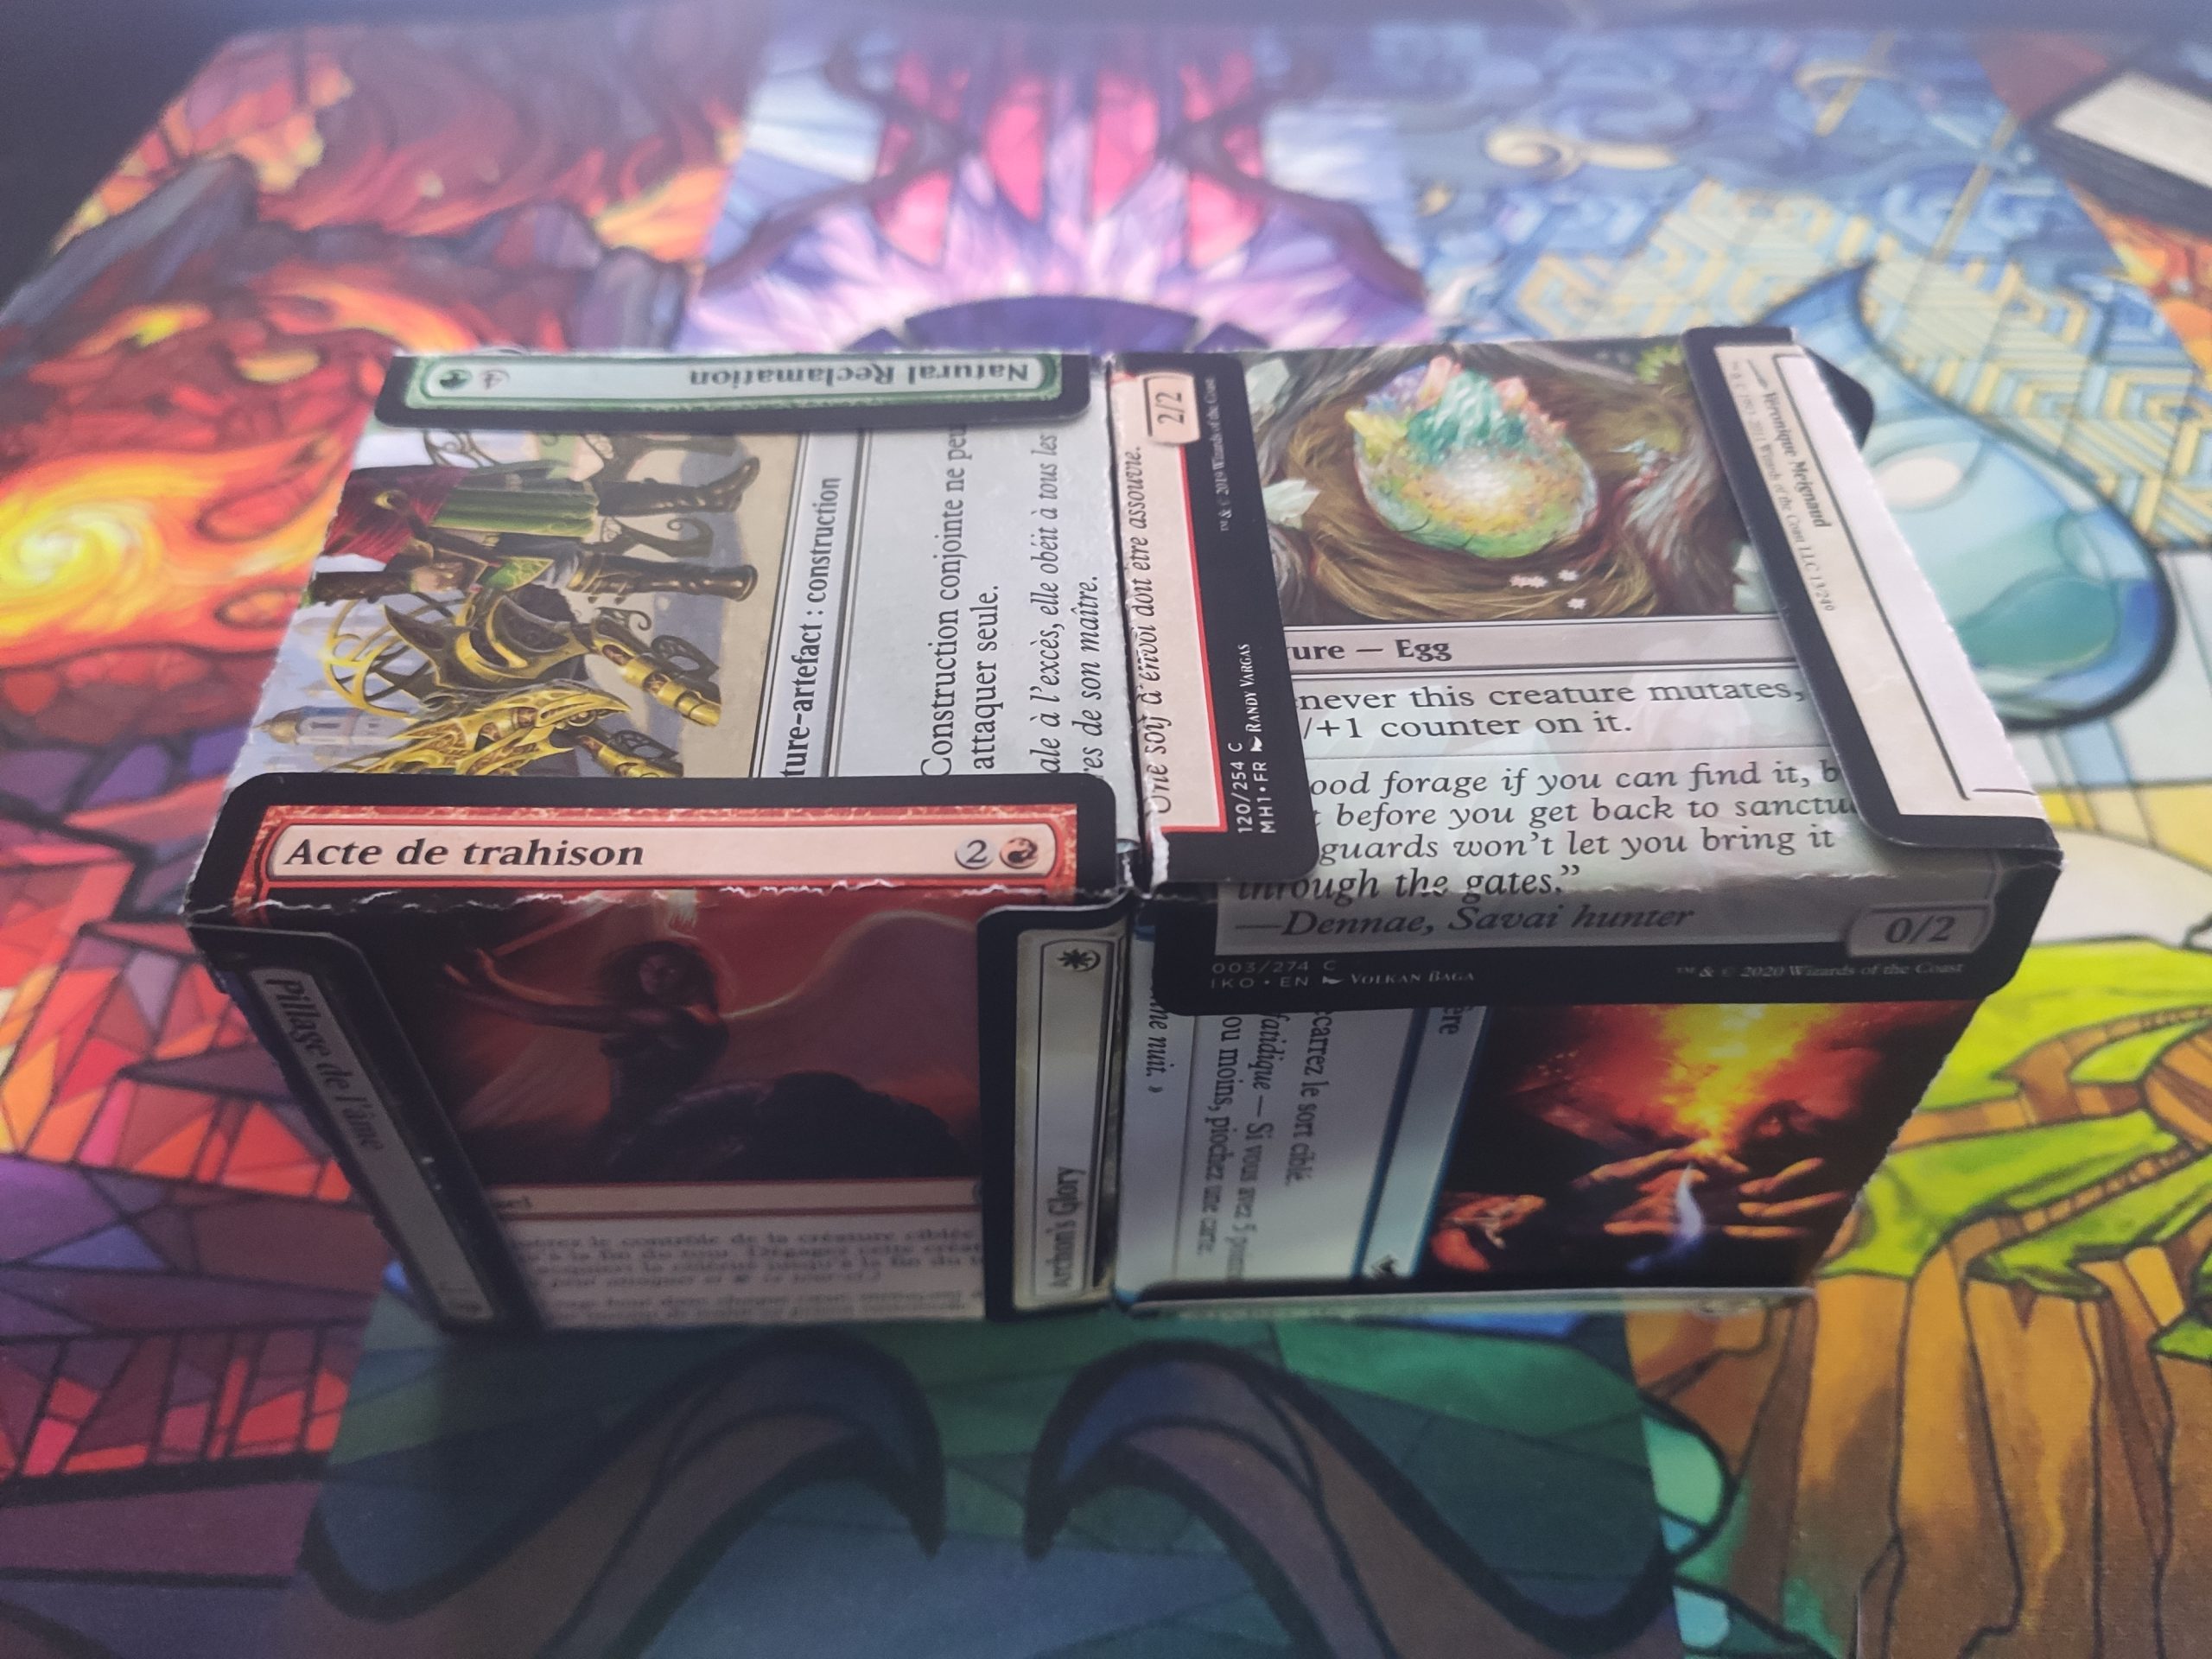
All that remains now is assembling the rest of the square, leaving the space in the middle empty. You should try to build it so that the last cube to be set in place is in the middle of one of the sides. I found it easier to insert it rather than fiddling with corners, but it’s up to you. If you do this right, the results should actually be decently sturdy.
Now build the four pillars with two cubes each time. This shouldn’t be too hard.
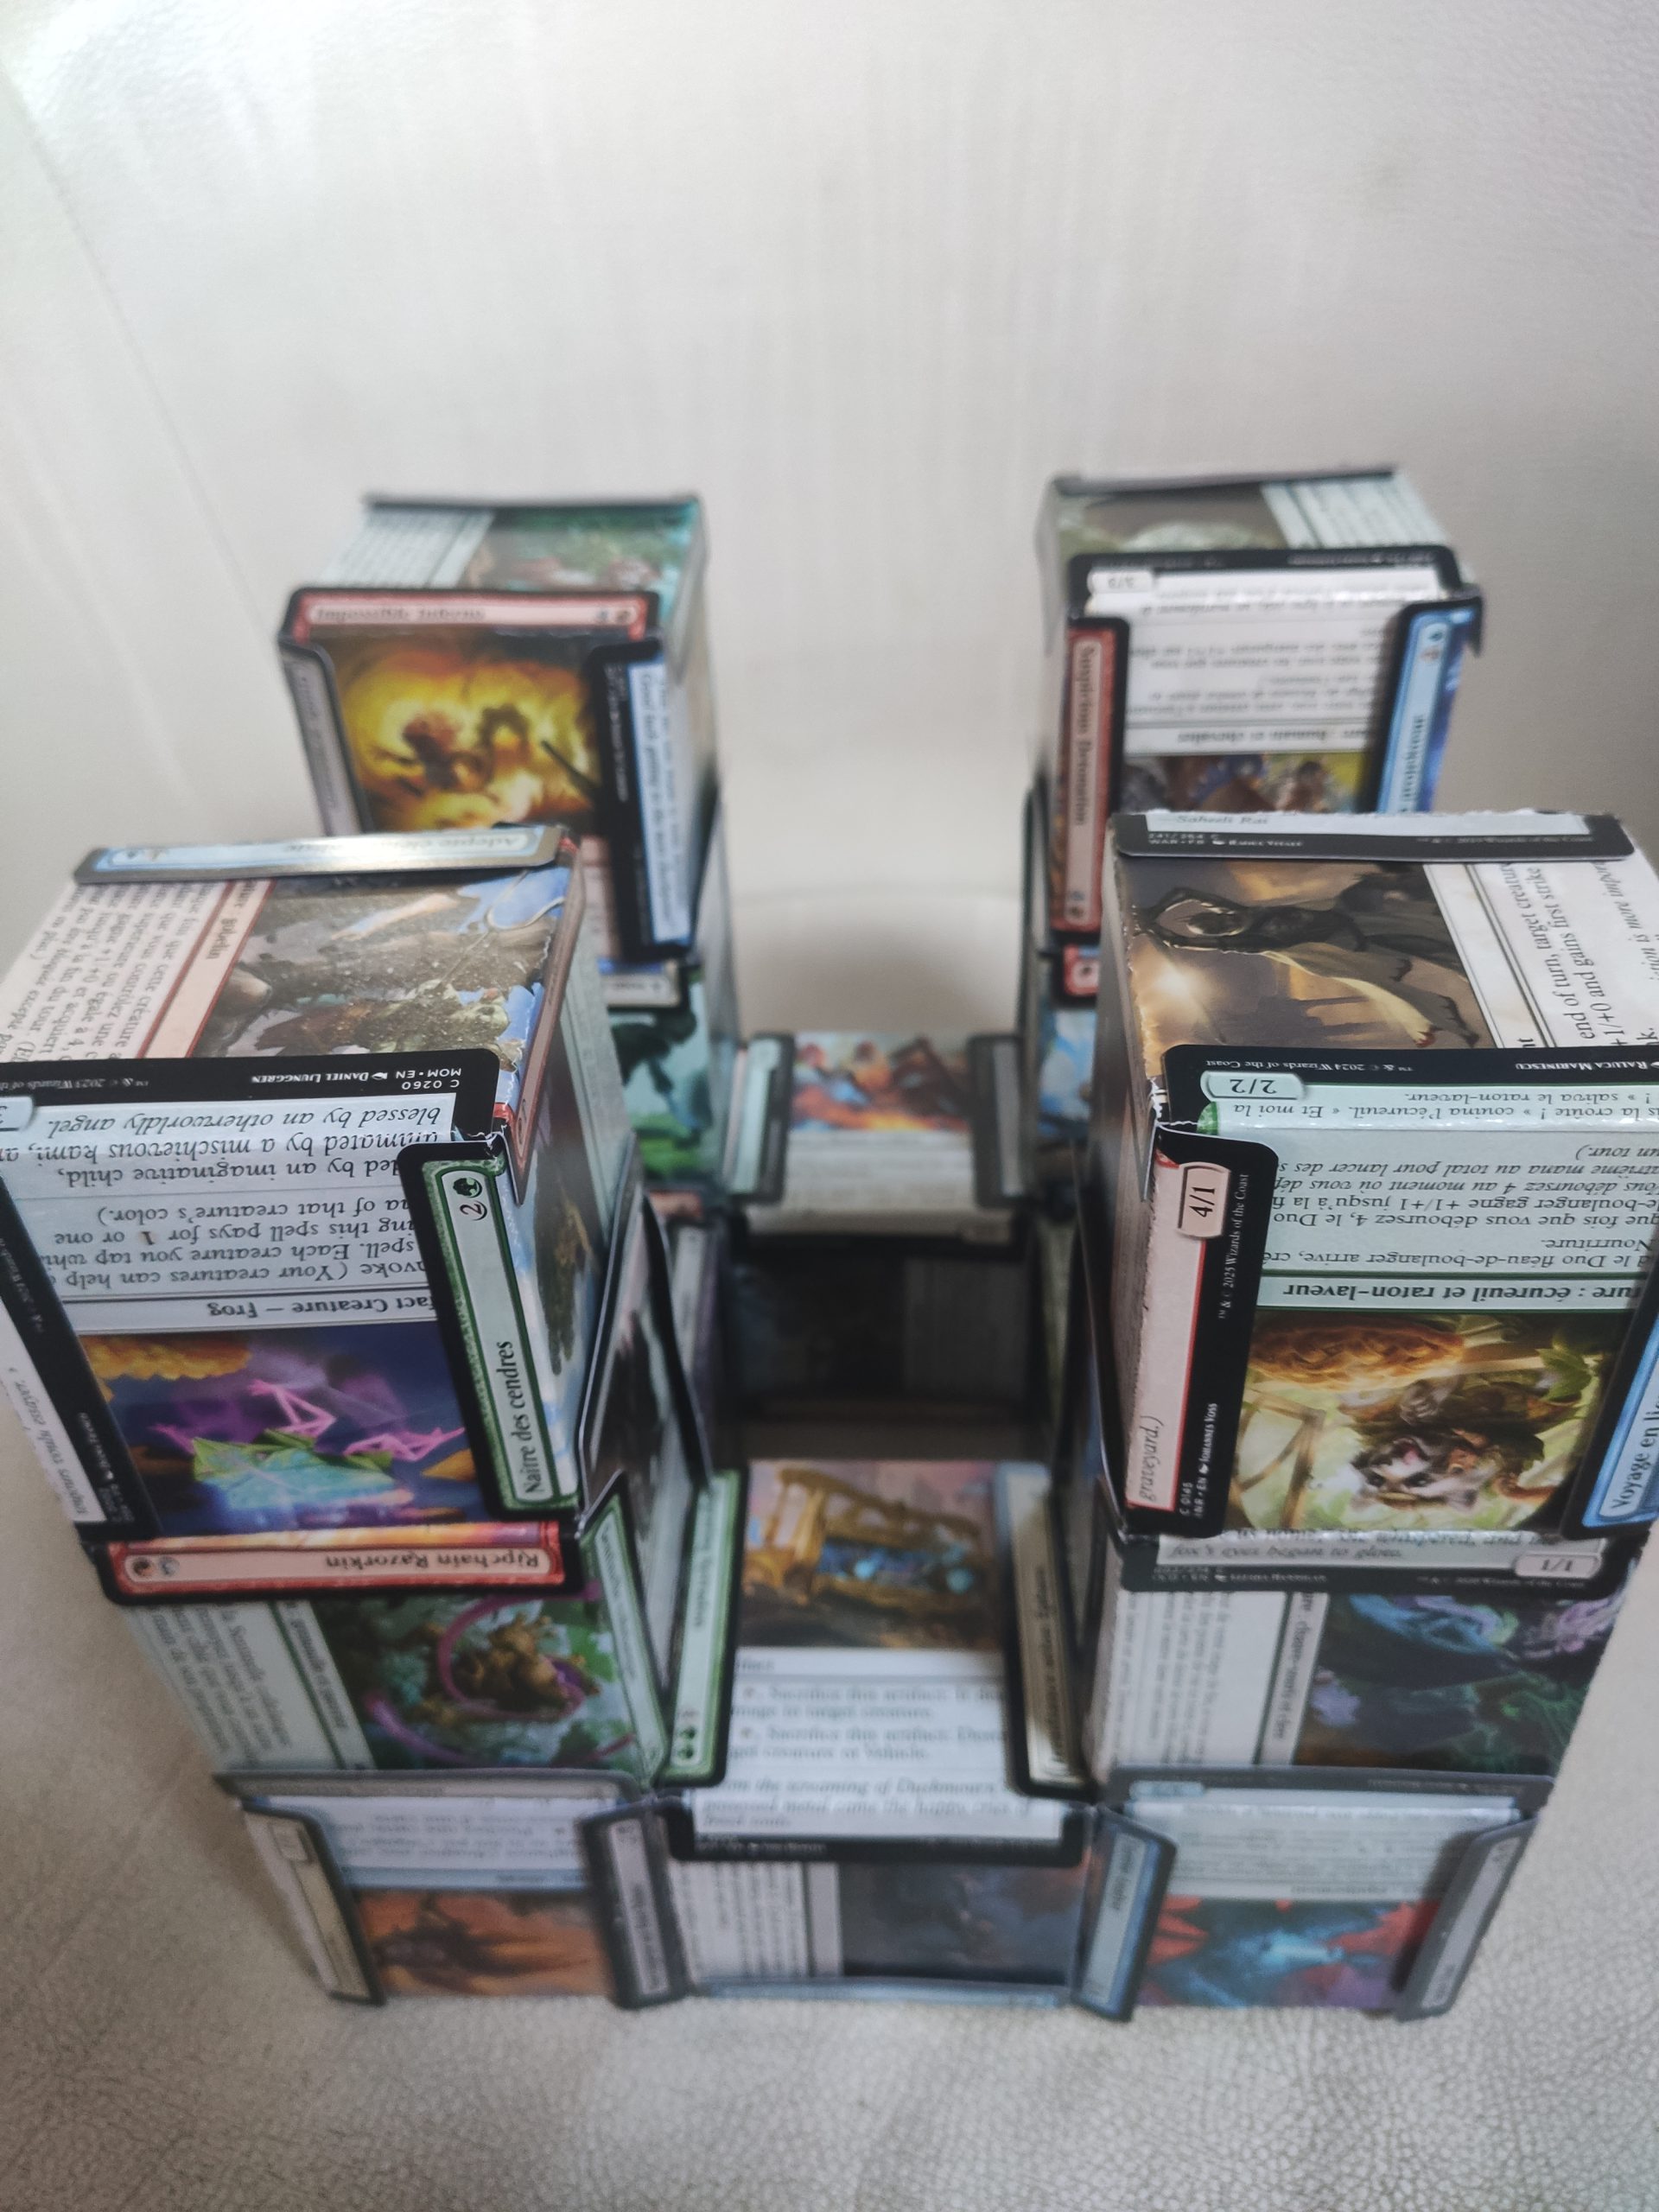
Last but not least, insert the final four cubes in each of the sides’ middle gaps.
While you can definitely simply slip the cubes in with some twisting, I find it actually easier to build them directly on the structure. First link the legs together, like so:
Next, suspend the inner card, and slip the sides in.
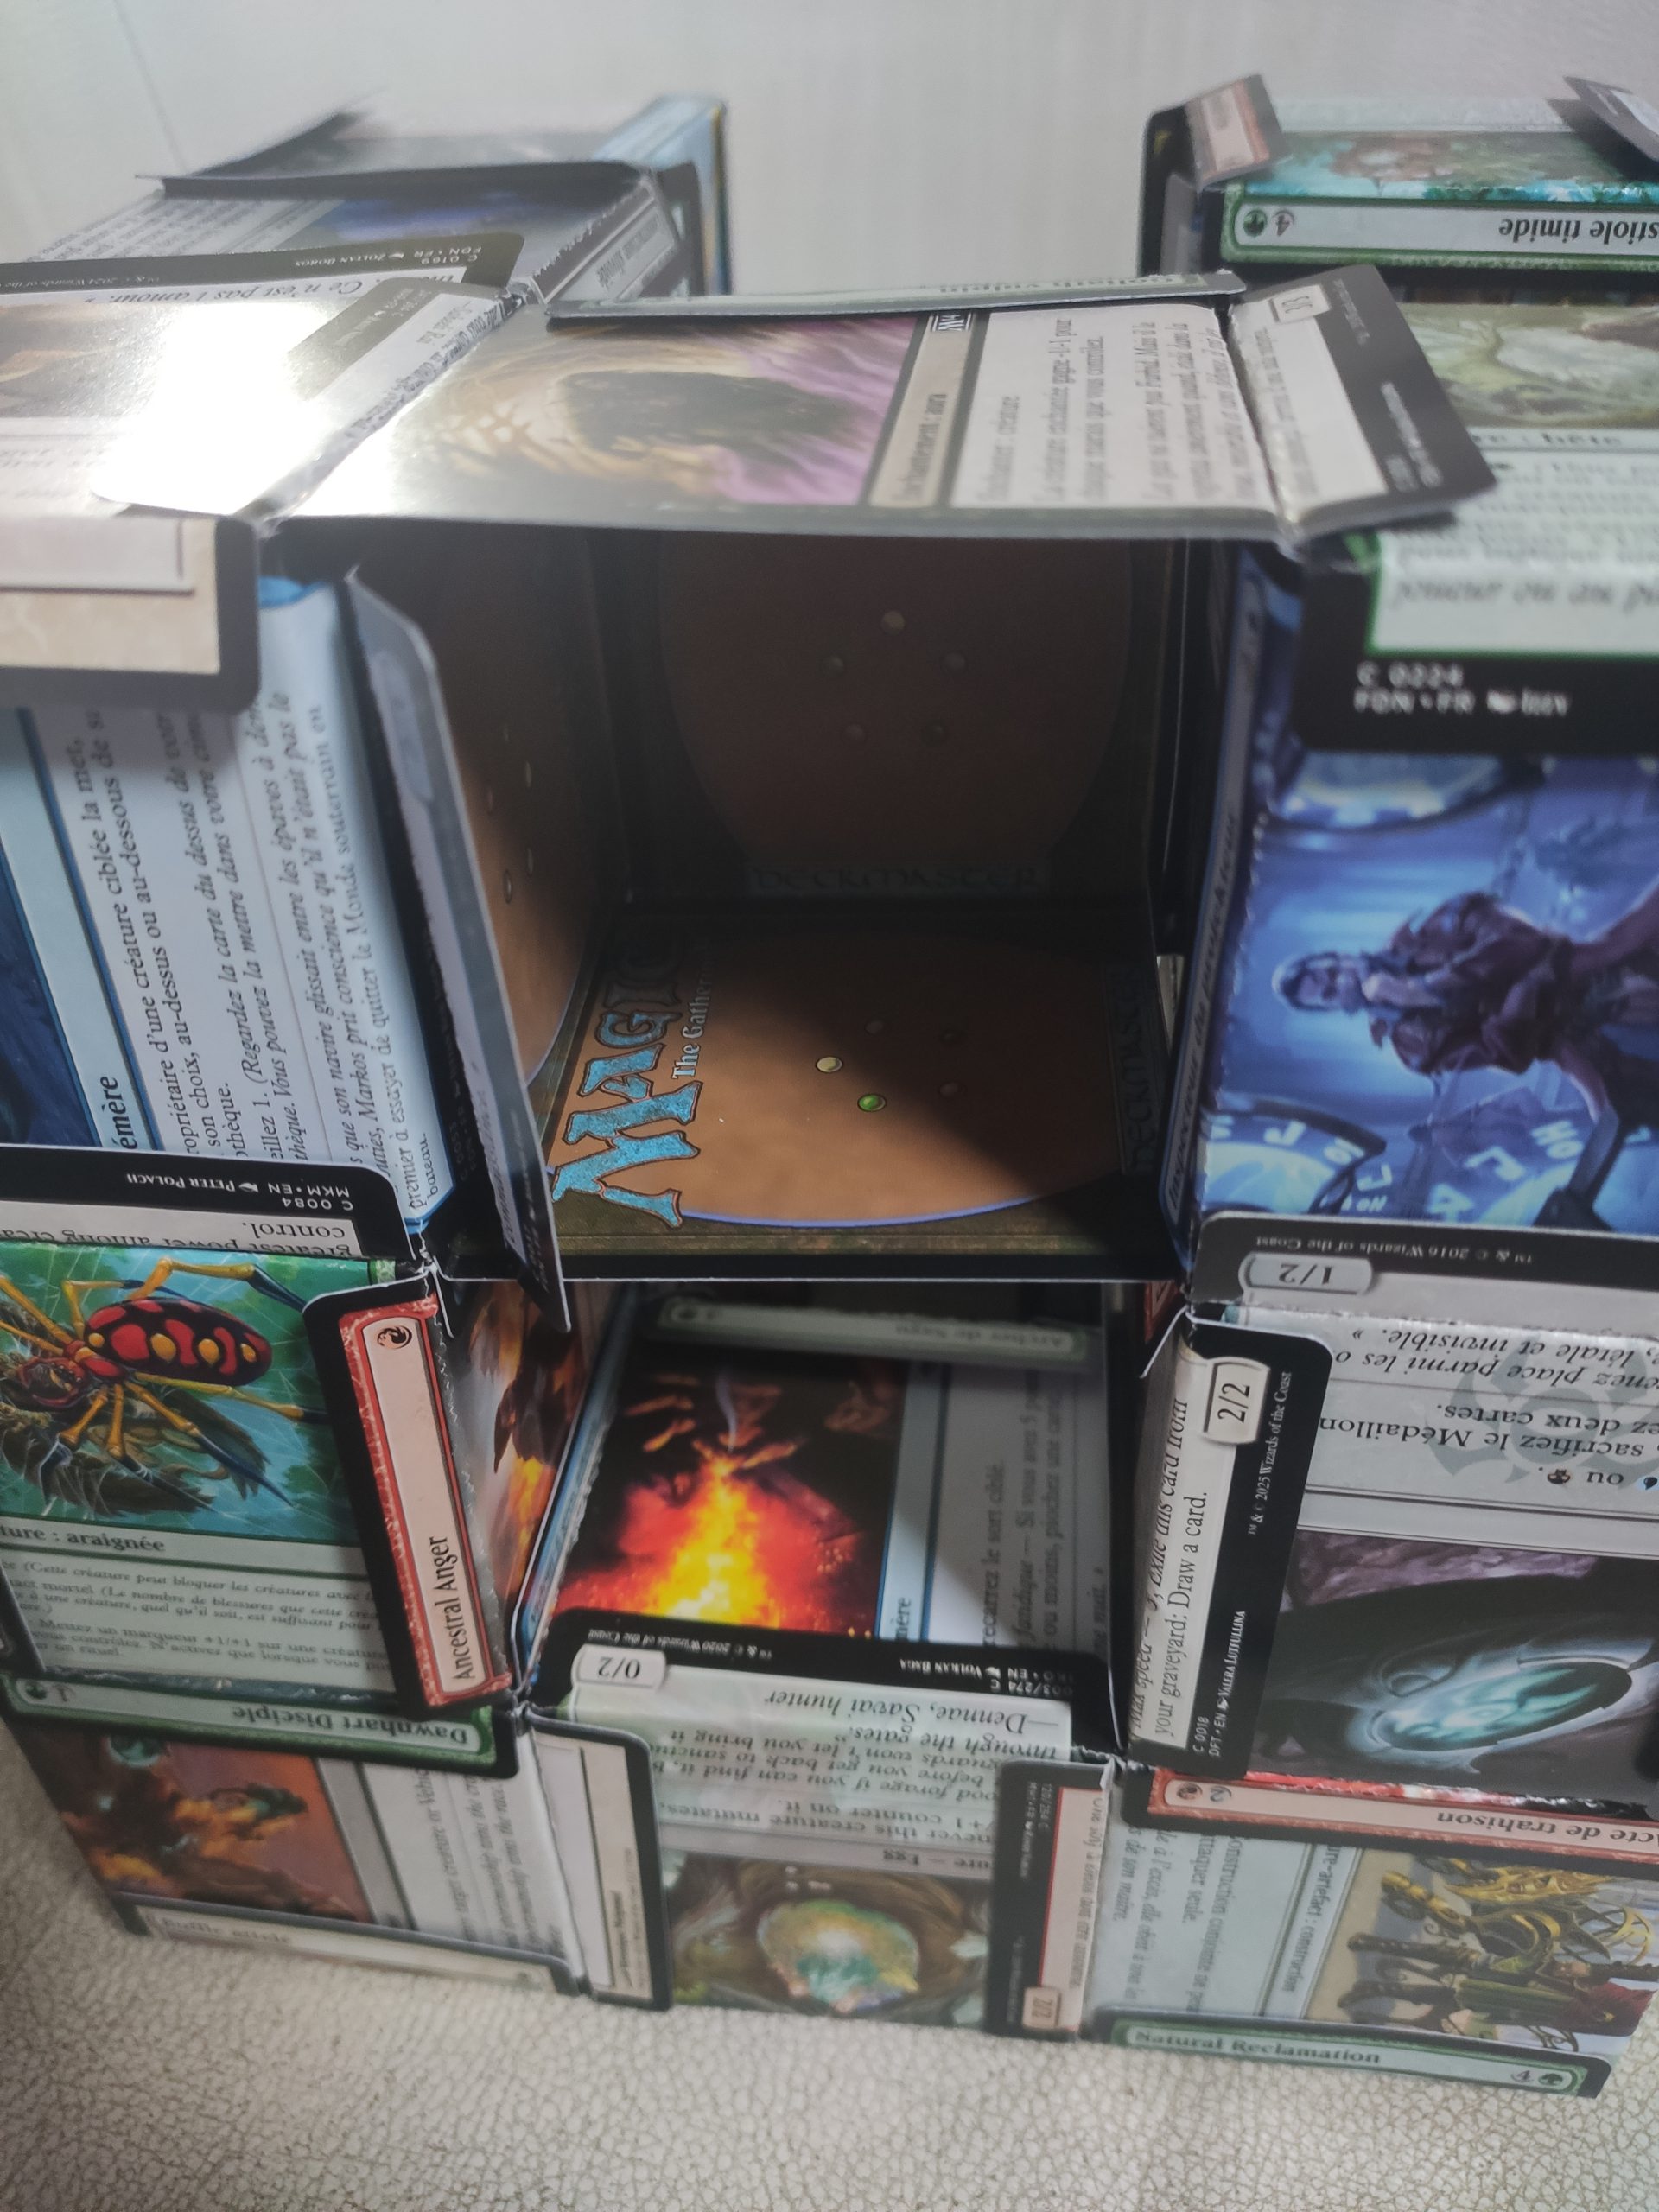
Finally, add the last card, carefully inserting it within the remaining legs.
Beware, this is a tricky and delicate step, perhaps the most delicate one of the whole project.
Do that three more times and… Tadaaaa, you’re done!
Now, if you want to step up to an M2 Sponge, just repeat this whole process another 19 times. I know I won’t…
If all tabs are correctly interlocked, this should be solid enough to even suspend or pin to a wall. Glueing the various tabs is another way to make it even sturdier, although it’s by no means necessary.
Next Endeavor: Make your own blank tokens and/or proxies
If this goes according to plan, next time I’ll teach you how to make both nice shiny reusable tokens, as well as beautiful proxies. And best of all, it’s very cheap!
So, see you… later?


